Creating screens
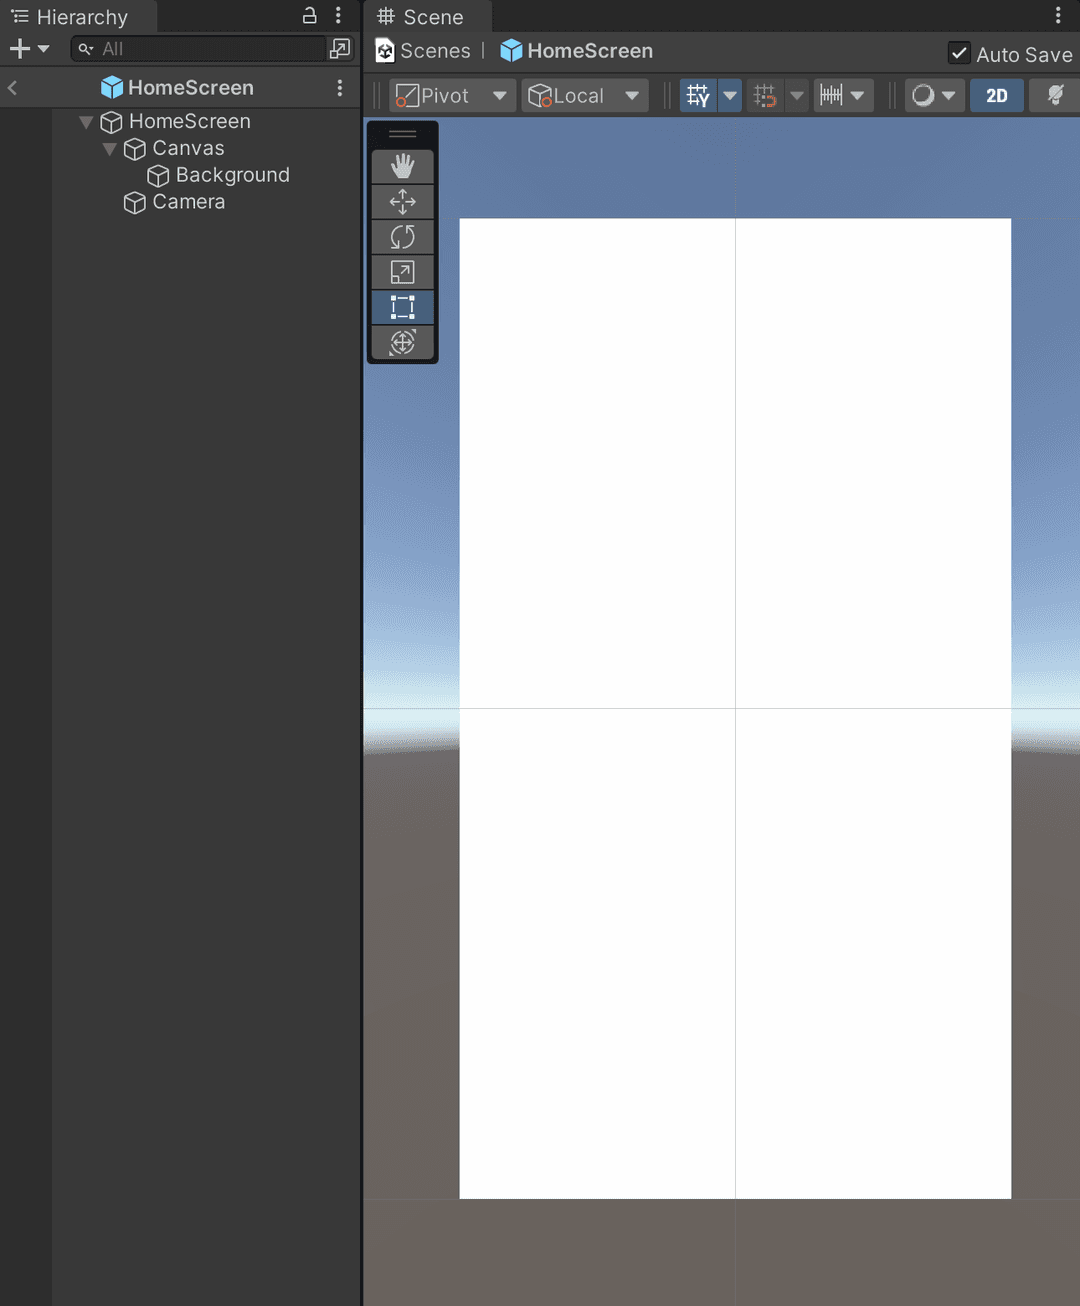
The easiest way to create a new screen is duplicating the EmptyScreen.prefab (or any existing screen) as it is setup to use the full benefits of indestructible UI.
Creating a button
Create a button and add the FlowEventSender component. Add the name of the flow event you would want to send.
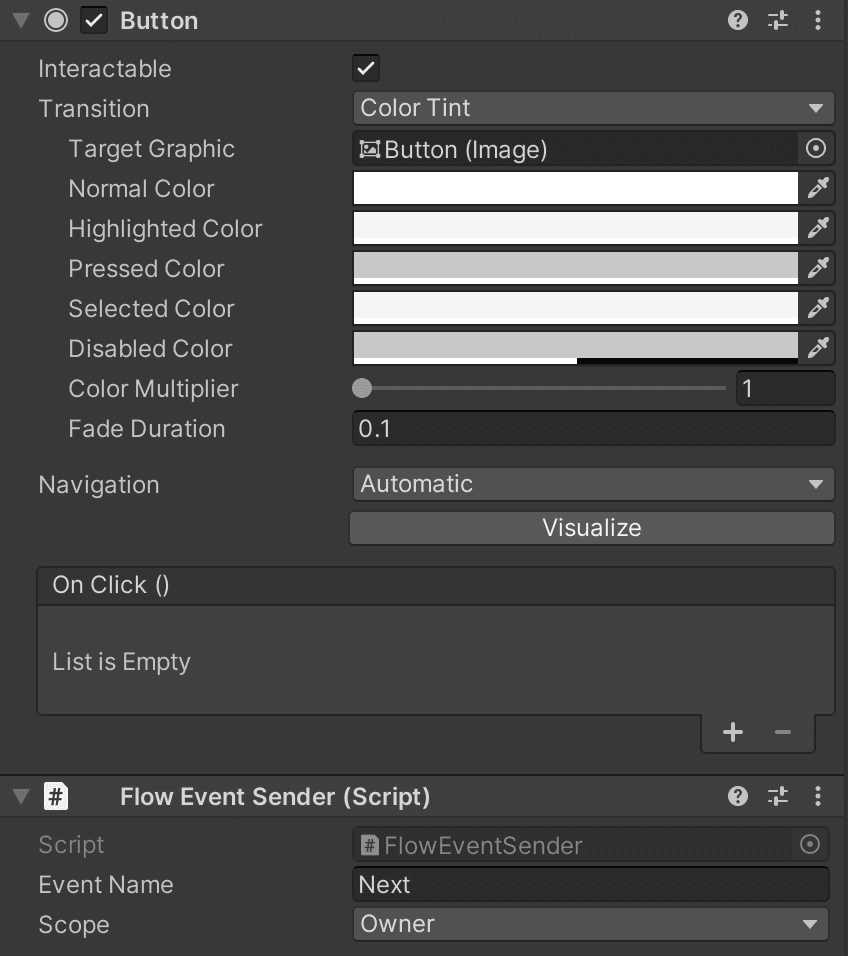
Now in the OnClick, add a new entry and link the FlowEvent component. Select FlowEvent/SendEvent from the method dropdown.
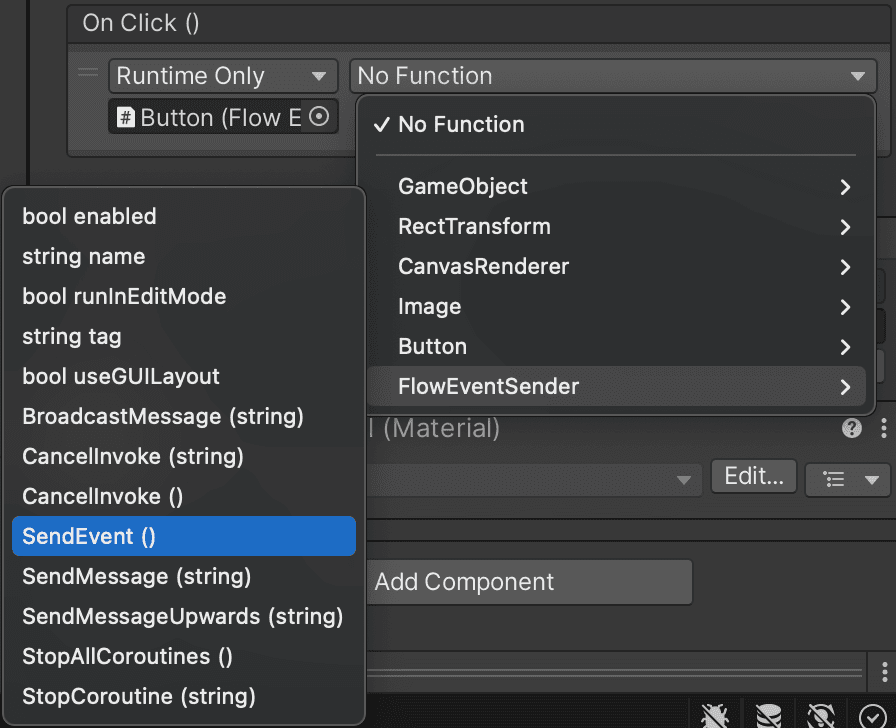
Alternatively, it is also possible to use the ButtonFlowEvent component, which does not require the need to link the UnityEvent.
Prefer using FlowEventSender
The reason it is better to use the FlowEventSender in an OnClick Unity event on a button, is to have full control of the code execution order.
For example you want to play an audio event when you click the button, play an animation and execute some specific logic: you would want those to happen before the event gets send as this changes the screen and removes the GameObject.
The rule of thumb is to always put the FlowEventSender.SendEvent() as the last element in the button's OnClick list.
Creating a node
Go to the flow where you want to add the new screen.
Right click and select the Action State (GameSuite) node to add it to the flow.
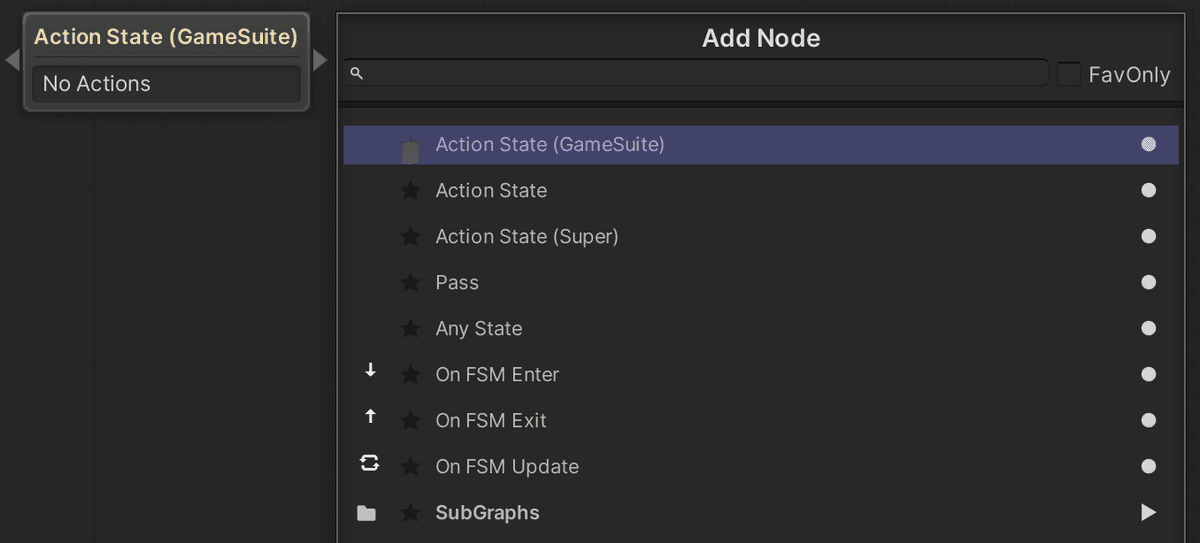
Now select the new node and add the Spawn Objects action under the GameSuite sub-menu:
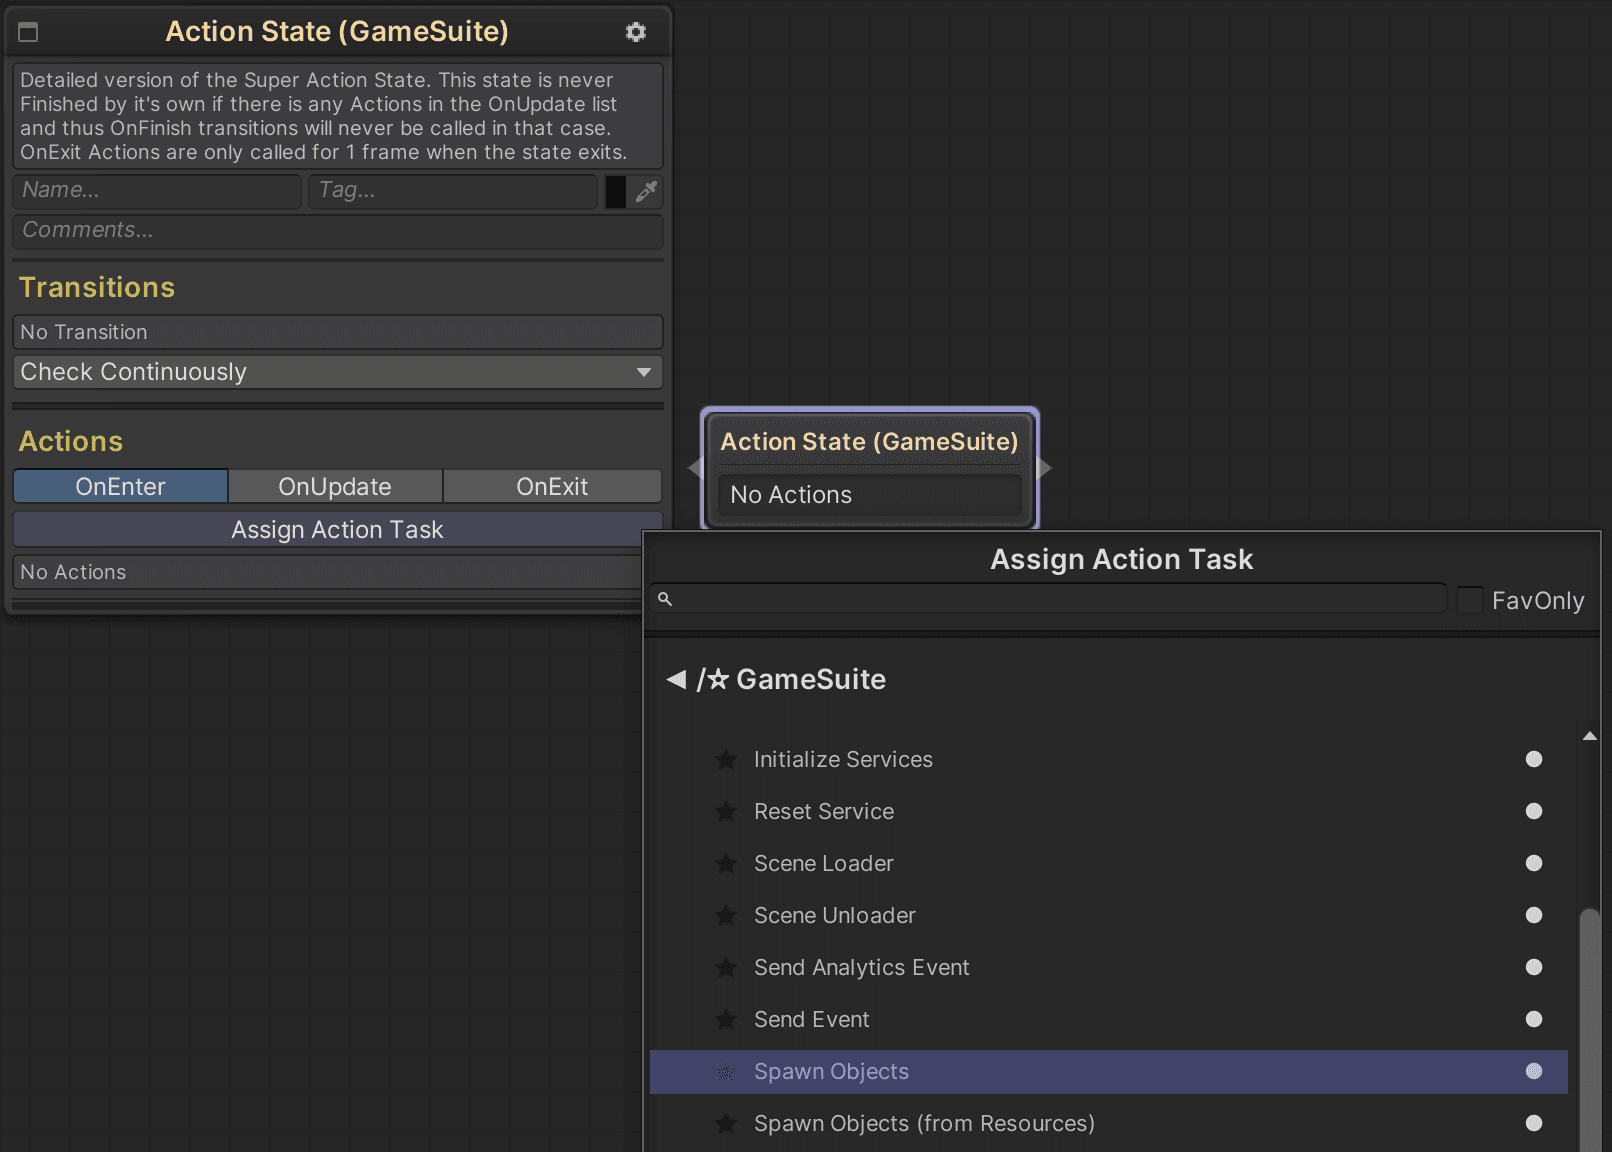
The Spawn Object flow action allows you to instantiate any addressable or resource object.

Load Async means the objects will get loaded in the background and spawned when finished loading. The upside is that the main thread does not get stalled and there is no performance hiccup. The downside is it could take multiple frames to load the objects, this has to be configured on a case by case basis. The default is instant loading which mostly results in the best visual result.
Allow Spawn Duplicate is off by default and it will only spawn a single instance of the item. There can be cases where a user can quickly transition out of a screen and back into it which would result in 2 instances of a screen to exist at the same time: 1 that is fading out and 2 that is fading in.
Parent uses the object finder to spawn these objects under another object in the Hierarchy.
Objects To Spawn
Select which screens to spawn, either by dragging and dropping or using the dropdown menu.
The node will take on the name of the first spawned object in the list when you have not set the name manually.
Spawn anything
The Spawn Objects action spawn any type of object wherever is needed in the hierarchy, and is not tied to only UI assets. In most cases though, this will be a Screen or Popup.
Also note that another action has been automatically added to the node as well by default in OnExit: Destroy Objects.
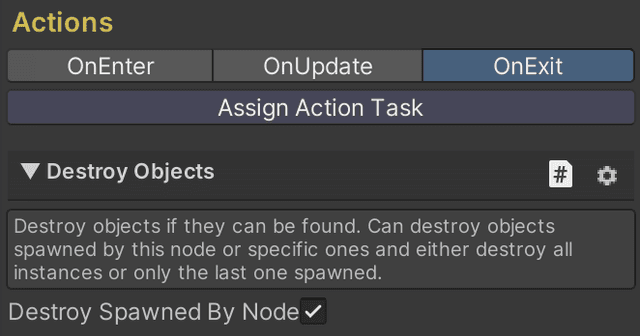
This flow action destroys (or fades out using a transition, see below for more info about this) any spawned objects by this node when exiting the node.
If you do not want to destroy what was spawned, just remove this action from the node in the OnExit tab.
Adding a connection
Now lets create a connection from the node to other nodes. Drag the arrow on either side of the node to start creating the connection between two nodes.
Select the connection by clicking the line, and add the FlowEvent condition.
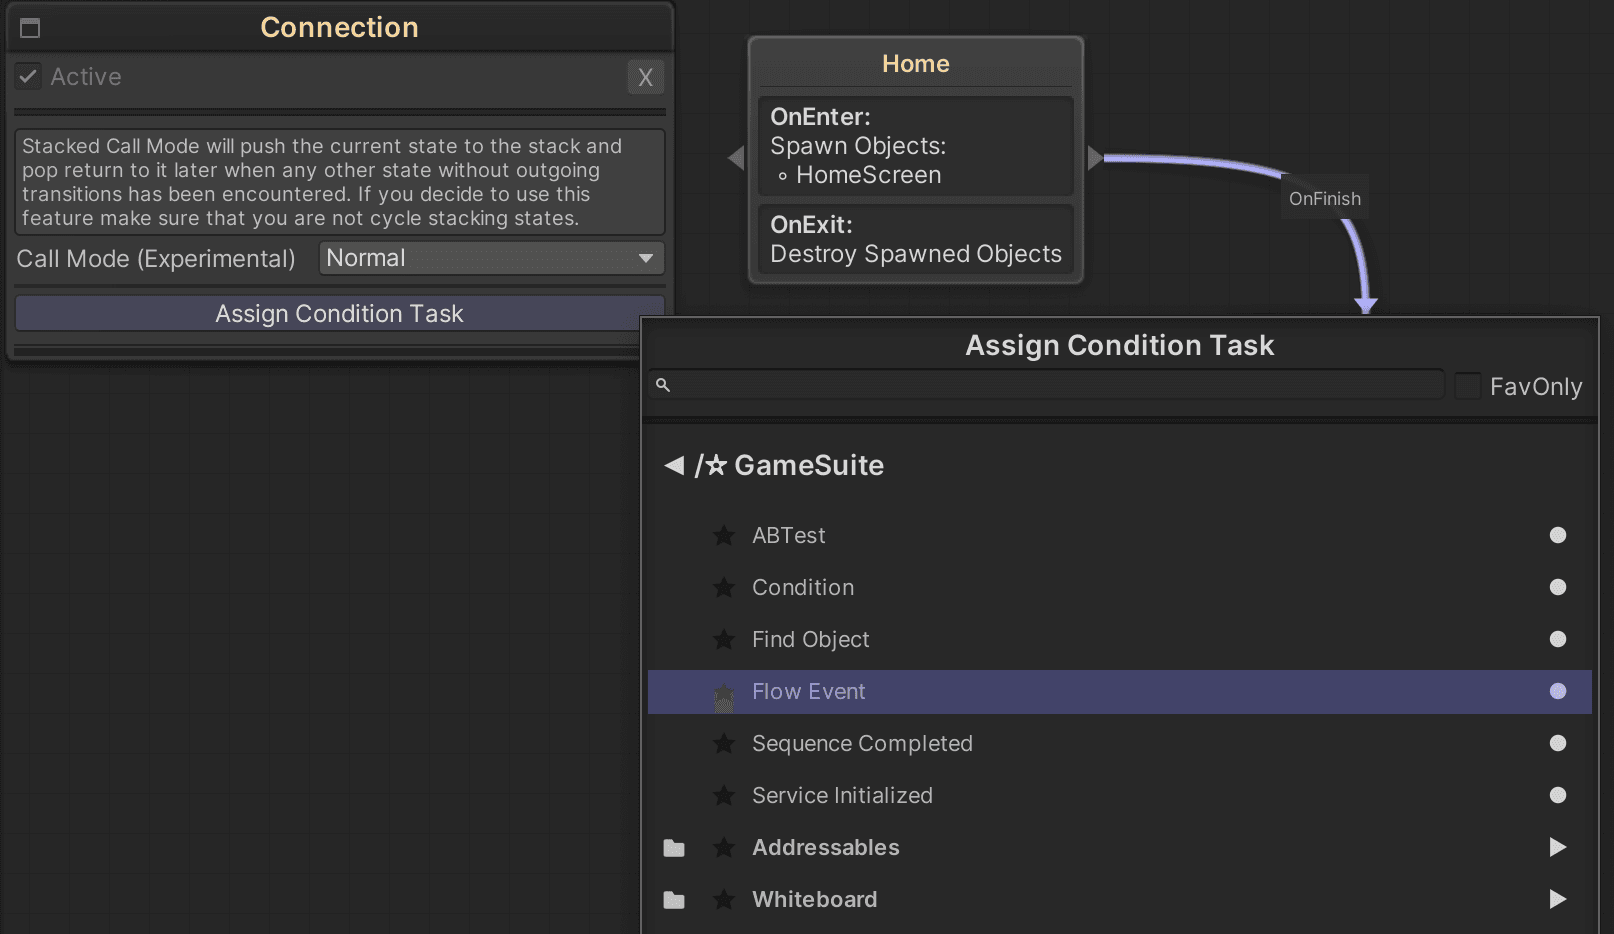
Because we added a FlowEvent component to the screen, the event selection dropdown is automatically populated.
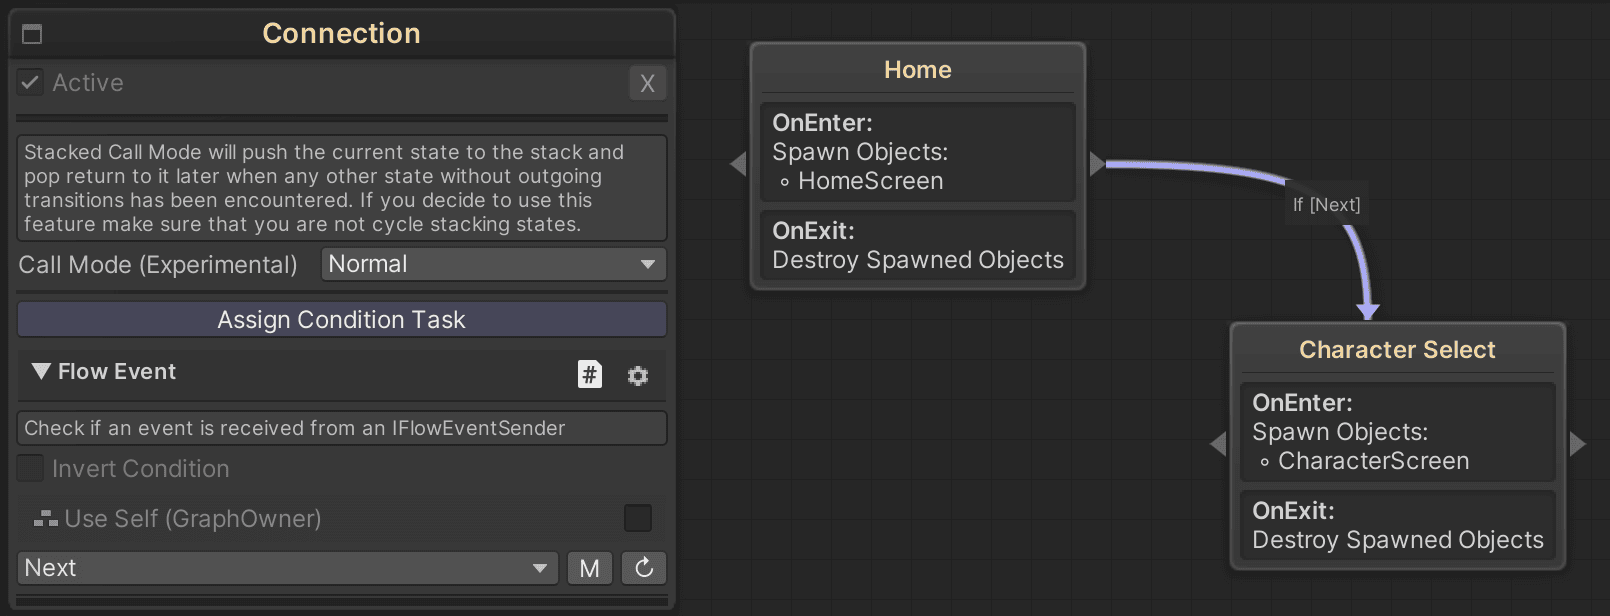
Whenever you add more objects containing FlowEvent components, the dropdown will automatically add these as well.
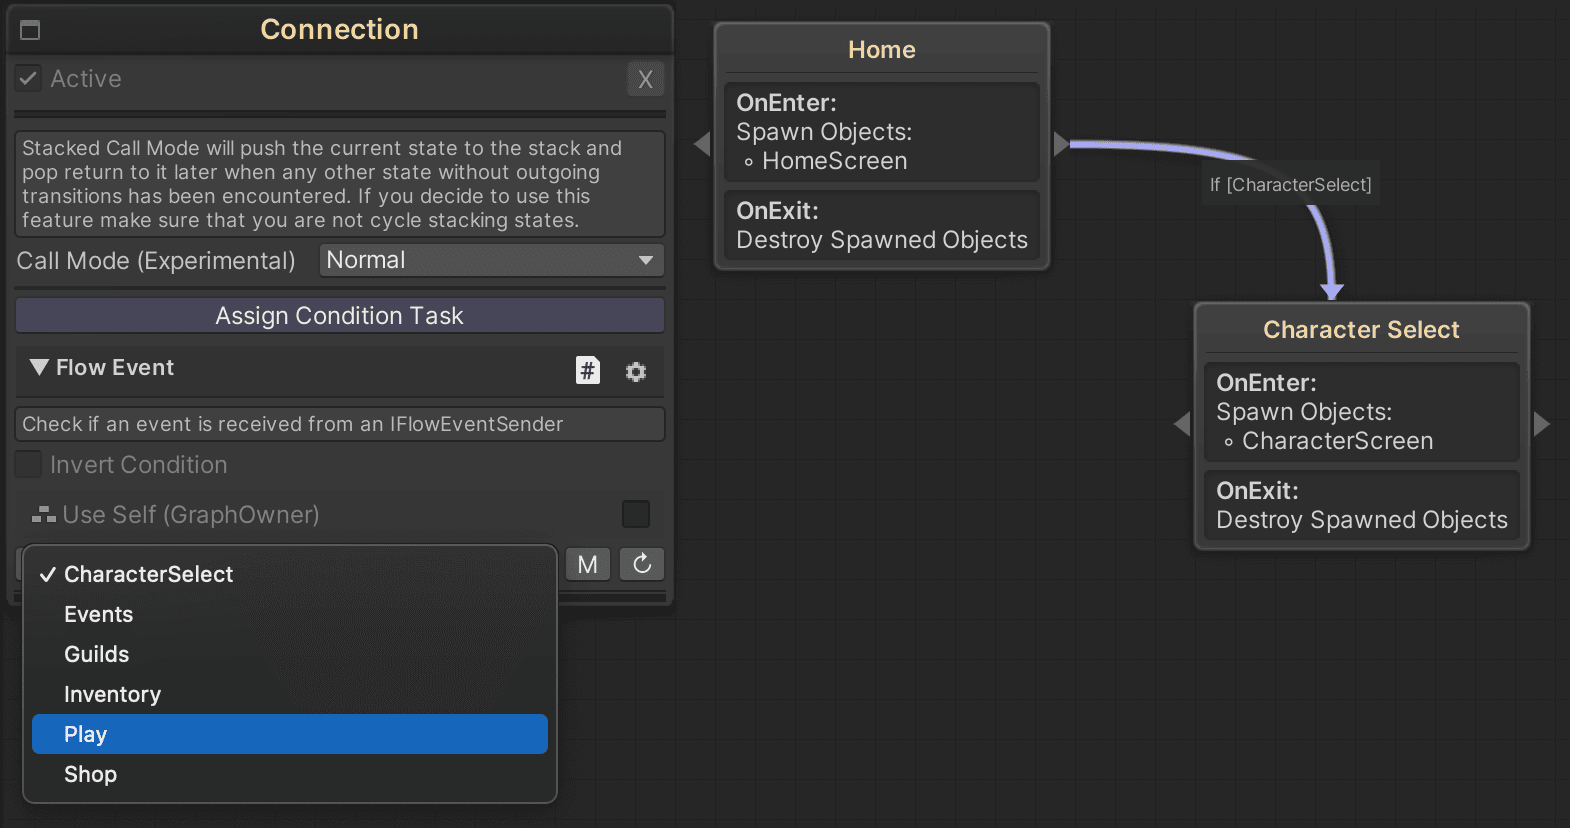
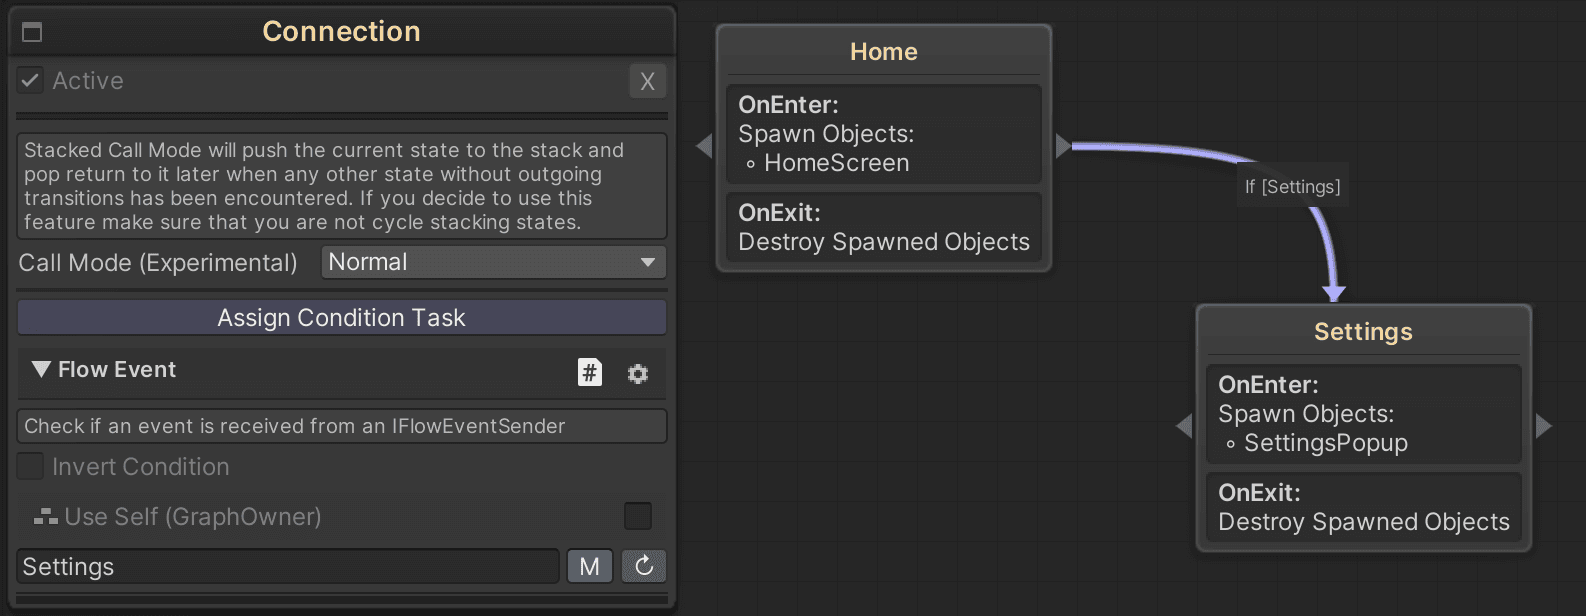
In the case of when you need to listen to an event that is not fired from the previous node, but somewhere else in the flow entirely, you can set the FlowEvent to manual mode and enter the name yourself. Do this by clicking the M button, and manually writing which event to listen to. This can for example be a settings event, which can be fired from multiple places throughout different screens and popups.
Custom Flow Events
Any kind of custom implementation can be created by inheriting from the FlowEvent and call the SendEvent() method.
However, in most circumstances, use a UnityEvent to execute the FlowEvent as it allows for more flexibility to also extend the method to, for example, play a sound fx, send an analytics event or change the display state of a menu item.
Flow scope
On the FlowEvent component, as well as other places throughout GameSuite, a flow scope can be defined.
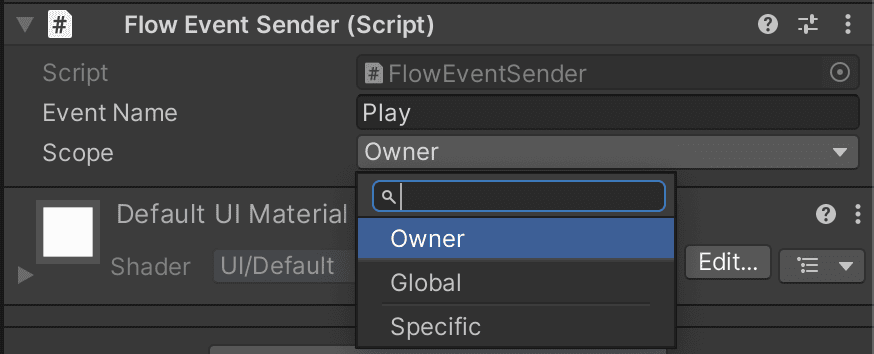
There are 3 different types of scopes:
Owner
Using the Owner scope is the most common use case. This scope sends an event to the graph from where the object got spawned. It allows multiple instances of the same object to be spawned from the flow in different places, each of which will send its event to their respective owner.
??? abstract "Using Owner scope on sub menu items"
When spawning sub-menu items inside a prefab, the Owner scope will not work out of the box, such as dynamically spawning buttons inside a screen.
You will have to pass down the reference to the owner node and FSM to the spawned buttons yourself.
Implement IFlowInteractor on the component that spawns all the buttons, and pass along the reference to all spawned sub-items:
public class ButtonSpawner : SerializedMonoBehaviour, IFlowInteractor
{
    [Resource]
    public Guid Button;
    public int Amount;

    public void SetOwner(FSM fsm, Node node)
    {
        transform.DestroyChildren();

        for (int i = 0; i < Amount; i++)
        {
            GameObject instance = GameResources.Instantiate(Button, transform);
            IFlowInteractor[] flowInteractors = instance.GetComponentsInChildren<IFlowInteractor>(true);

            for (int j = 0; j < flowInteractors.Length; j++)
            {
                flowInteractors[j].SetOwner(fsm, node);
            }
        }
    }
}
Global
Global scope fires an event which will be received by any flow condition throughout the entire app that is listening to this event name.
Dynamic graphs
Using global is most useful when graphs are dynamically swapped on the fly and a direct reference to an FSM is not possible.
Use Global with caution
In most cases, avoid using the global scope, as it can have big (future) repercussions.
For example: When an event would be triggered named Back, all active nodes which are listening to a Back event in the entire flow hierarchy would get triggered.
When using globals, it is safest to have a prefix to a flow event name, such as SettingsBack instead of just Back to avoid conflicts.
Specific
This scope allows you to select in which sub flow the event should fire. It requires you to select the owner graph and inside of which sub flow node or parallel sub flow node it should fire on.

This allows the app to send an event to a specific instance of a flow, such as having multiple flows which have a settings sub flow node, but only wanting to send the flow event to a particular instance of the settings flow.
Screen transitions
Screen transitions can add that extra polish to your game UX and GameSuite provides a very powerful, customizable and expandable tool to do anything you could want.
Read the UI chapter to learn how to make your screens come to life.