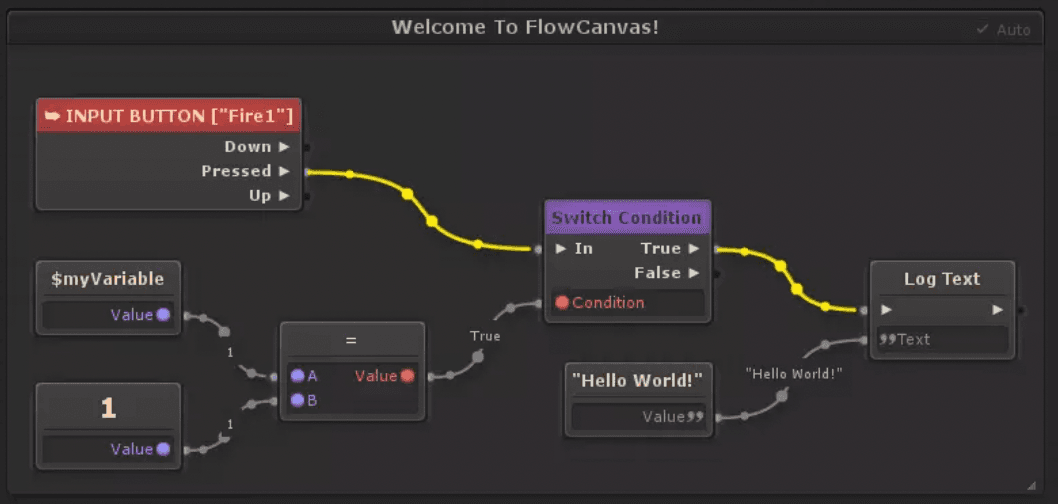
📥 Flow Editor
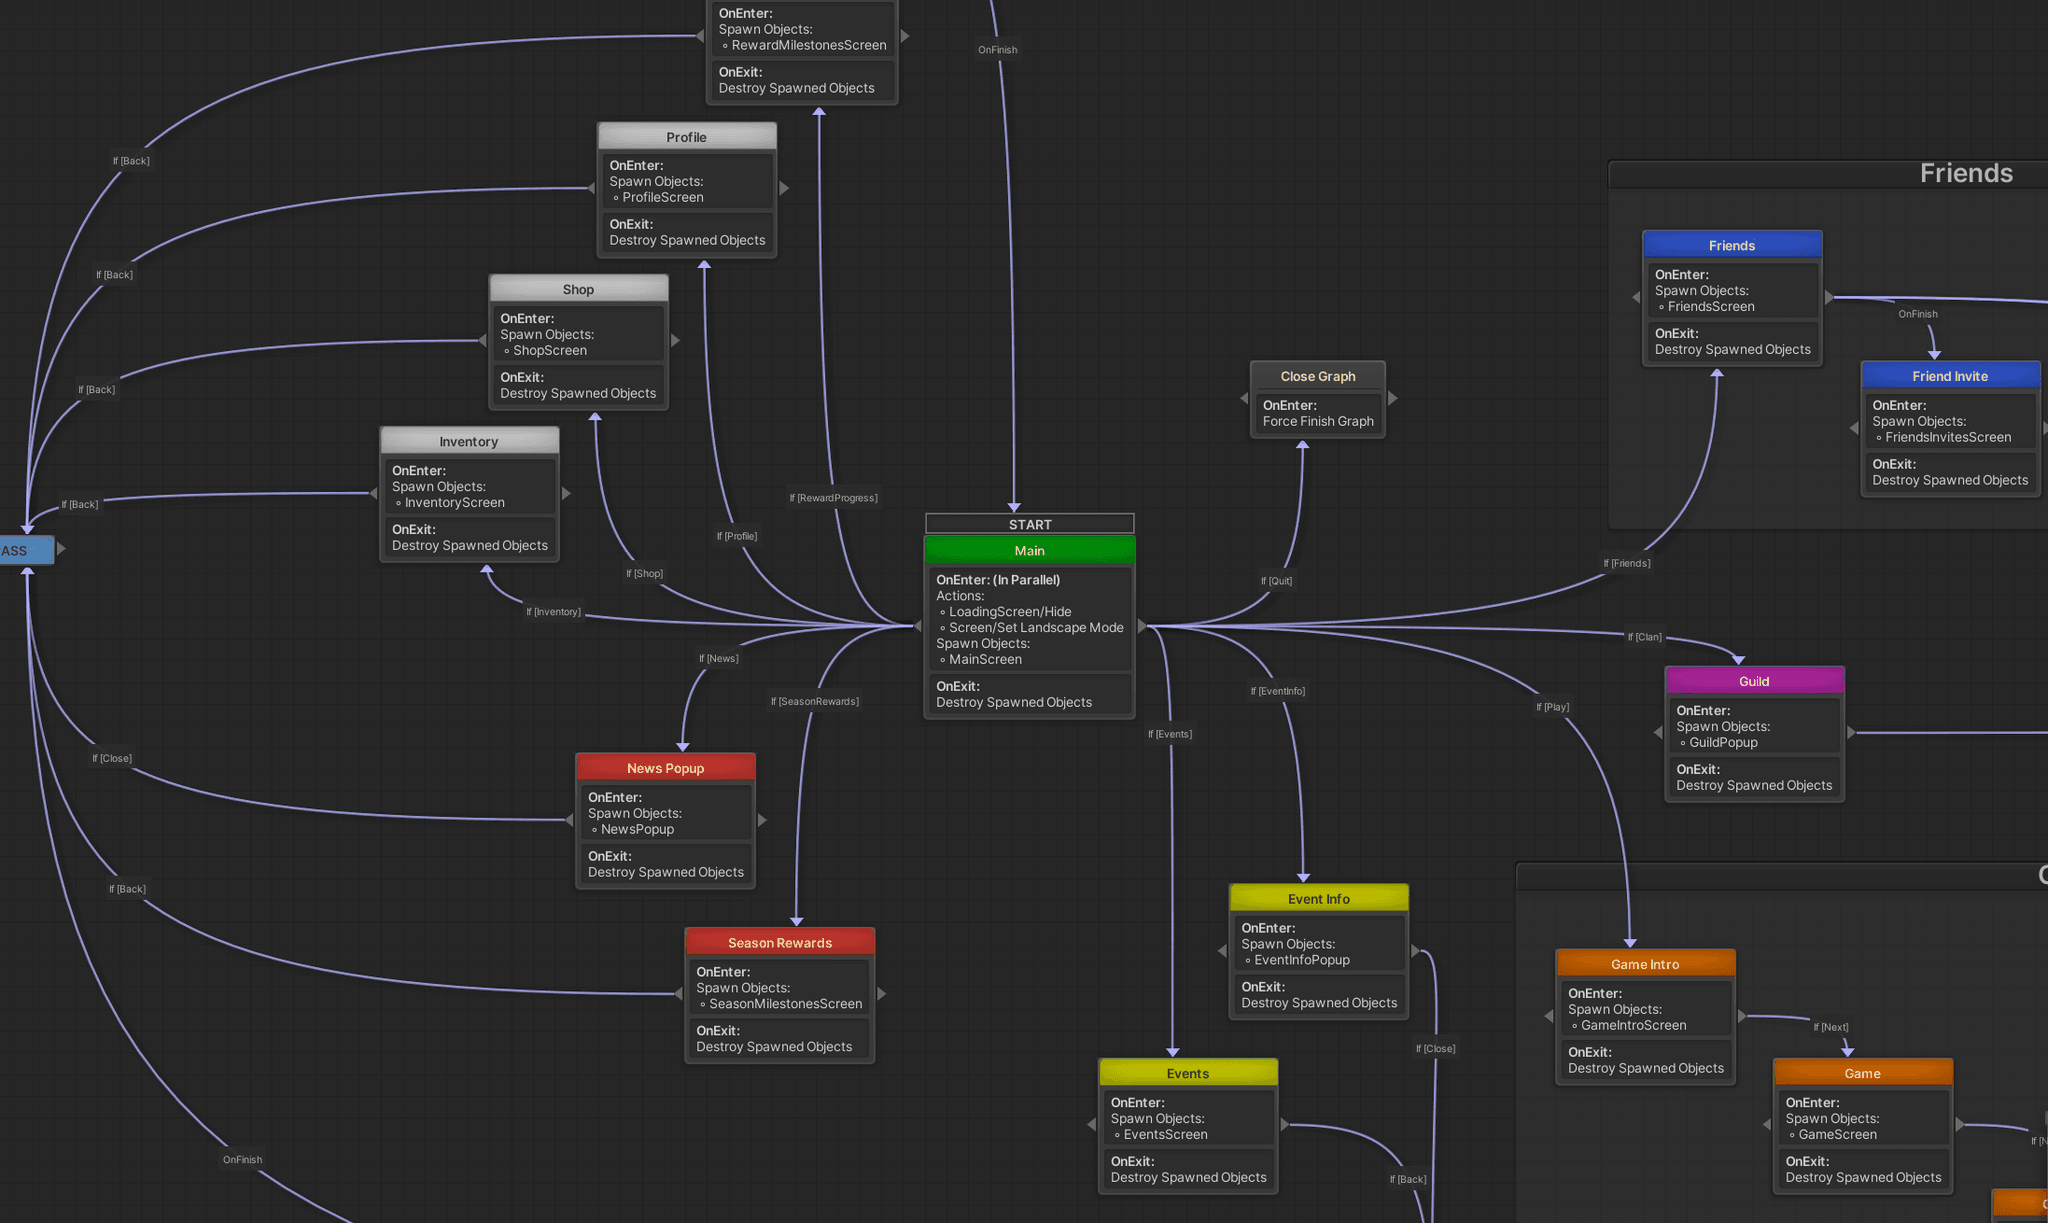
What is the Flow Editor
- A Finite State Machine (FSM) that manages the flow of the application through its lifecycle
- A visual tool to quickly and easily add new screens and functionalities by adding nodes to create the entire app flow in an intuitive way
- The entry point of the application, without the flow, there is no app
- The GameSuite Flow editor is an extension to Paradox Notion's NodeCanvas (opens in a new tab)
Flow vs graph
A graph is a single layer of an FSM. The flow is the hierarchy of graphs which can contain many child/sub graphs.
Advantages of the Flow Editor
- Quickly and easily setup a full application lifecycle
- Allows rapid prototyping, but is build for release
- Designers layout the application, then let developers and artist fill in the blanks
- Allows anyone to quickly create and edit the app flow
- Visual feedback on what the app is doing at any time
- View and control the flow from the debug menu on device
- Using the flow and tools promotes decoupling
- Easy to extend functionality with custom script behaviors
- AB test entire flows
- See data being passed around
- Jump to any state of the game
- Maximum control of what and when assets get spawned
- Easy object and scene lifecycle management
- Control application music
- Execute any code from the flow
- Disable application paths based on player progression
- Set break points on nodes
- Supports creating complex popup and overlay layering
- Supports screen transitions
- Supports async loading of assets
- Node editor can also be used for visual programming, AI, game state etc.
Flow setup
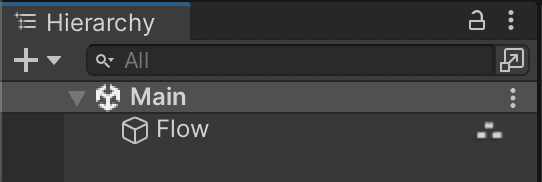
Before adding nodes and creating your app, we have to setup our Main Unity scene first. Go through the project setup chapter on how to setup your Unity project and scene layouts.
Meta flow
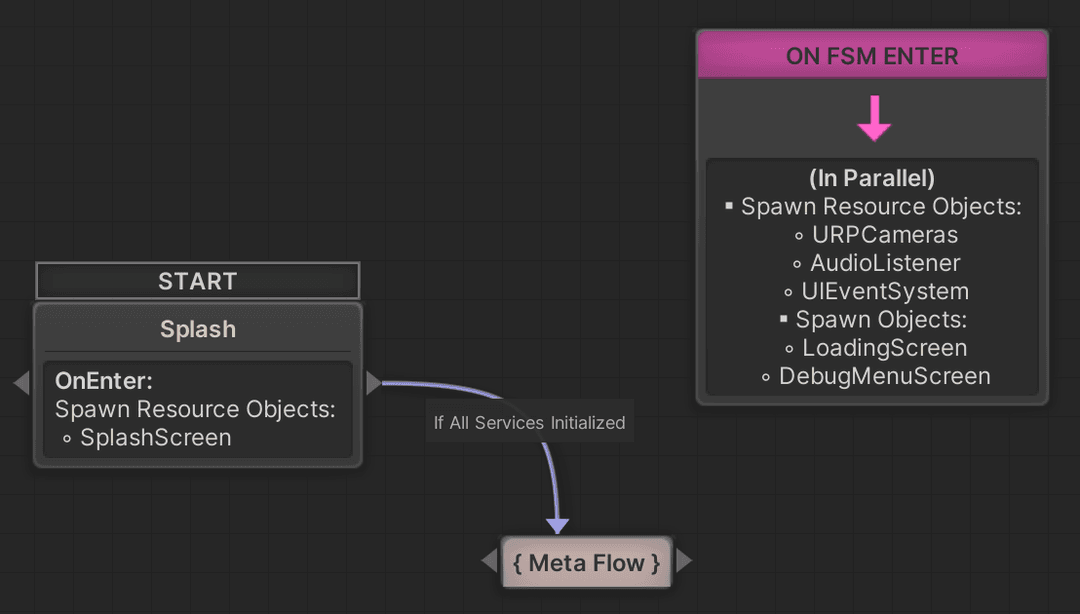
The default MainFlow should be fairly similar for all applications.
There are 3 nodes by default:
- Splash node: The entry point of the application and spawns the Splash screen
- Meta Flow node: The meta flow is where your application truly starts. Add all your game specific flow nodes and sub flows go in here.
- On FSM Enter node: This is a parallel node that spawns the camera setup, audio, UI input, loading screen and debug menu screen.
The line in between the Splash and Meta Flow nodes is called a condition, which waits for a certain condition to be true, in this case, it waits for all Services to be initialized before continuing to the Meta Flow node.
Pro tip: Changing the game
You could even swap the entire flow itself for an entirely different flow on the fly to present a different gaming experience to different users. For example replacing the RacingGameFlow with RTSGameFlow. Go through the AB Testing chapter to learn more.
Creating nodes
Right click anywhere in a graph to open the node type selection dropdown.
Depending on the circumstances, you would want to use one node type of the other. We advice choosing the nodes covered here, and avoid using the build in nodes to build the application flow.
Lets go over the nodes you should be using in your application
Action State
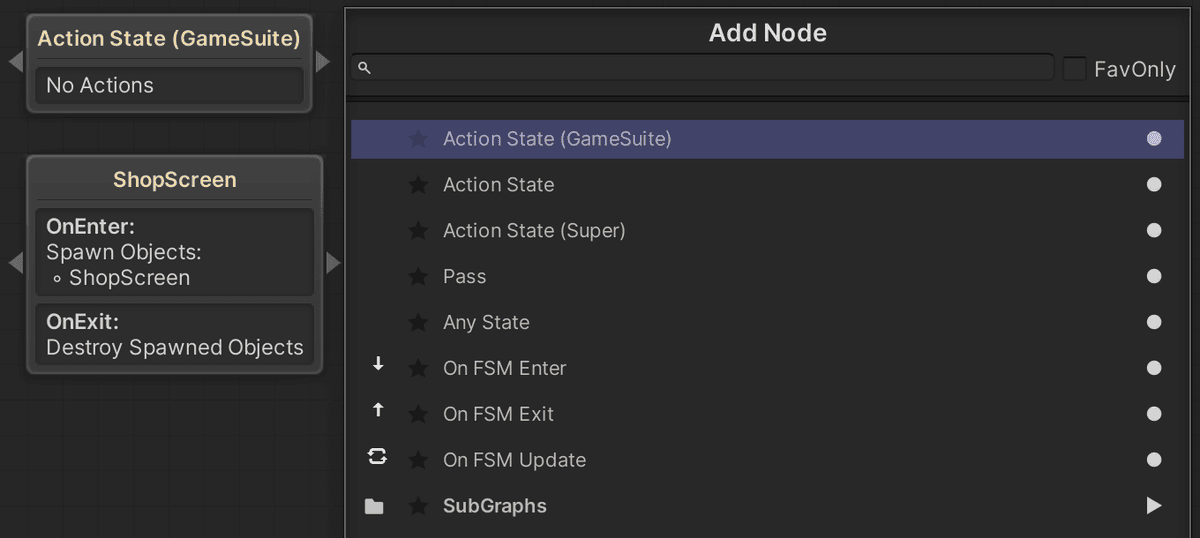
Action State (GameSuite) is the most used node in your application. It allows having actions and can be inter-connected using transitions.
The Action State node allows to execute flow actions OnEnter, OnUpdate and OnExit.
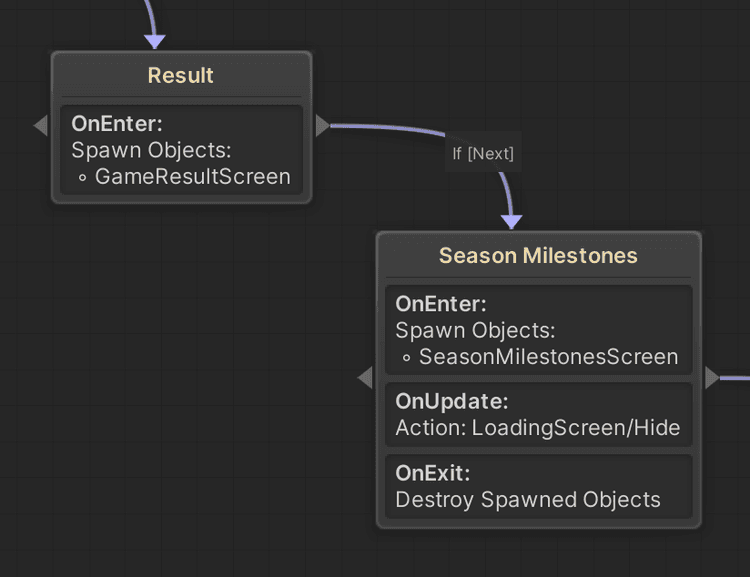
This is a more complex example of what an Action State could look like:
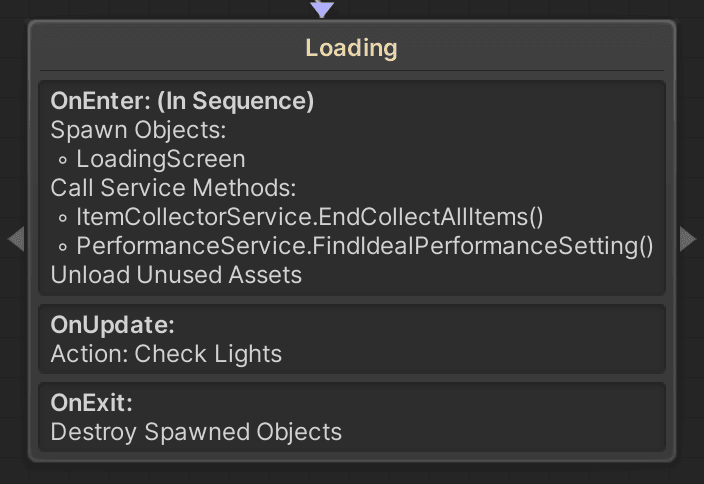
Changing node types
Note that changing node types is a manual process. There are other built-in types of action states, but we strongly advise using the Action State (GameSuite) as it allows maximum flexibility and to avoid having to change node types later on.
Sub FSM
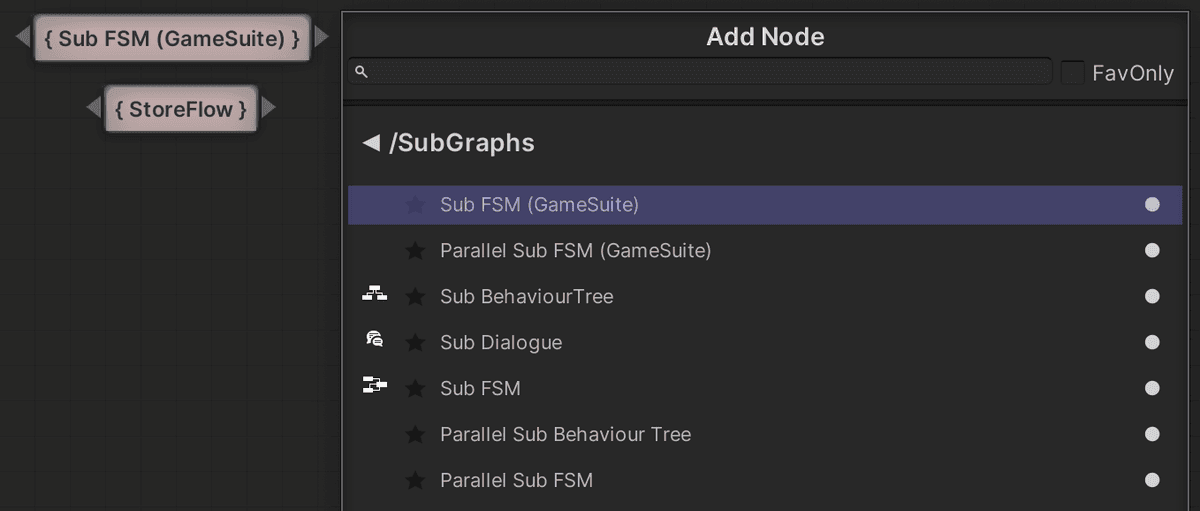
Sub FSM (GameSuite) can be found under the SubGraphs section. This allows a child FSM to be active while this node is active. This node is very useful as it enables having many layered sub FSMs, creating extremely complex setups. When assigning an FSM, the name of the node automatically changes, but can be customized to suit your needs.
While inside a sub FSM, there are 3 ways to get out of this node:
- Add any transitions to the sub FSM node itself which exits by itself.
In this simple example, after 5 seconds, the sub FSM would stop.

Reset or resume
The exit mode allows a sub FSM to restart from the Start Node, or to pause and resume where it left off.
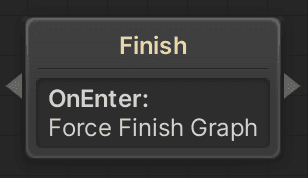
- Add an OnFinish transition with either success or fail. From within the sub FSM, add the action Force Finish Graph to a node and assign if the flow should be market as Success or Fail state. This will then exit the sub FSM node and take the OnFinish transition with the corresponding success state.
- Add a Send Event action to a node and set the target to Parent. This will allow you to listen to a flow event from the transition conditions on the sub FSM node.

Parallel Sub FSM
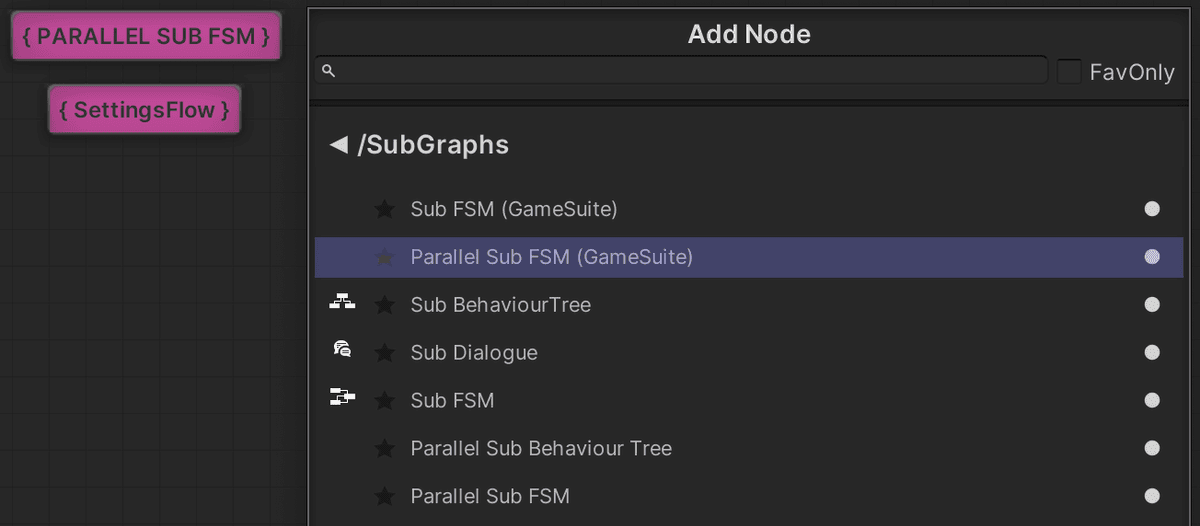
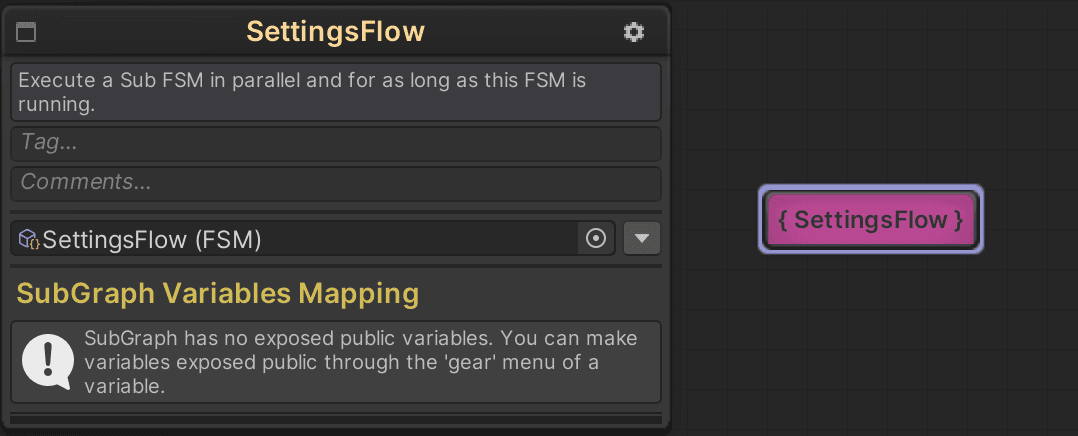
These sub FSMs are always active as long as the parent FSM is active. They cannot be connected using transitions either from or to this node.
Sub FSMs allow having multiple active flows at the same time. Such as having the game running while having a pause screen and a settings flow on top. Each flow stays active and can be navigated at the same time. Just be sure to block all input from any overlays so the player does not accidentally interact with layers underneath. We will dive deeper into this in the creating screens chapter.
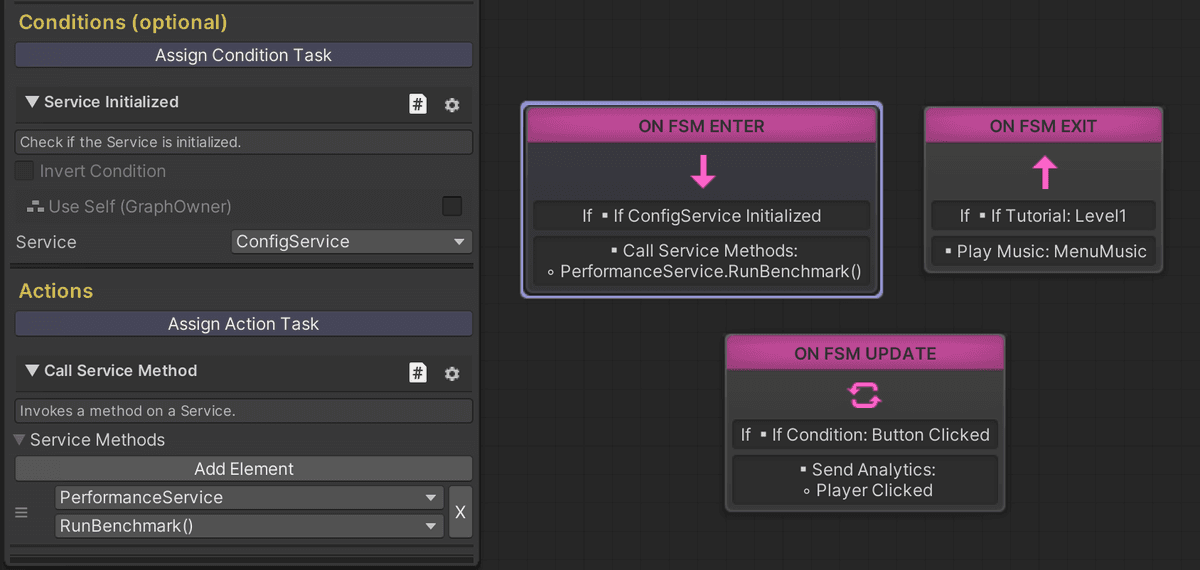
OnFSMEnter, OnFSMUpdate, OnFSMExit
Execute actions when the graph starts, stops or on every update while this graph is active. Optionally, multiple conditions can be assigned to only execute the actions when the conditions are met.
Pass
Complex graphs with lots of nodes will unavoidably create overlapping transitions. This can make the graphs hard to read and maintain.
Lets look at an example, these transitions are overlapping and this can become cluttered very fast. Of course this is a very simple example, but things get especially hard to read when transitions have to travel all the way across the flow, covering many other nodes in the process.
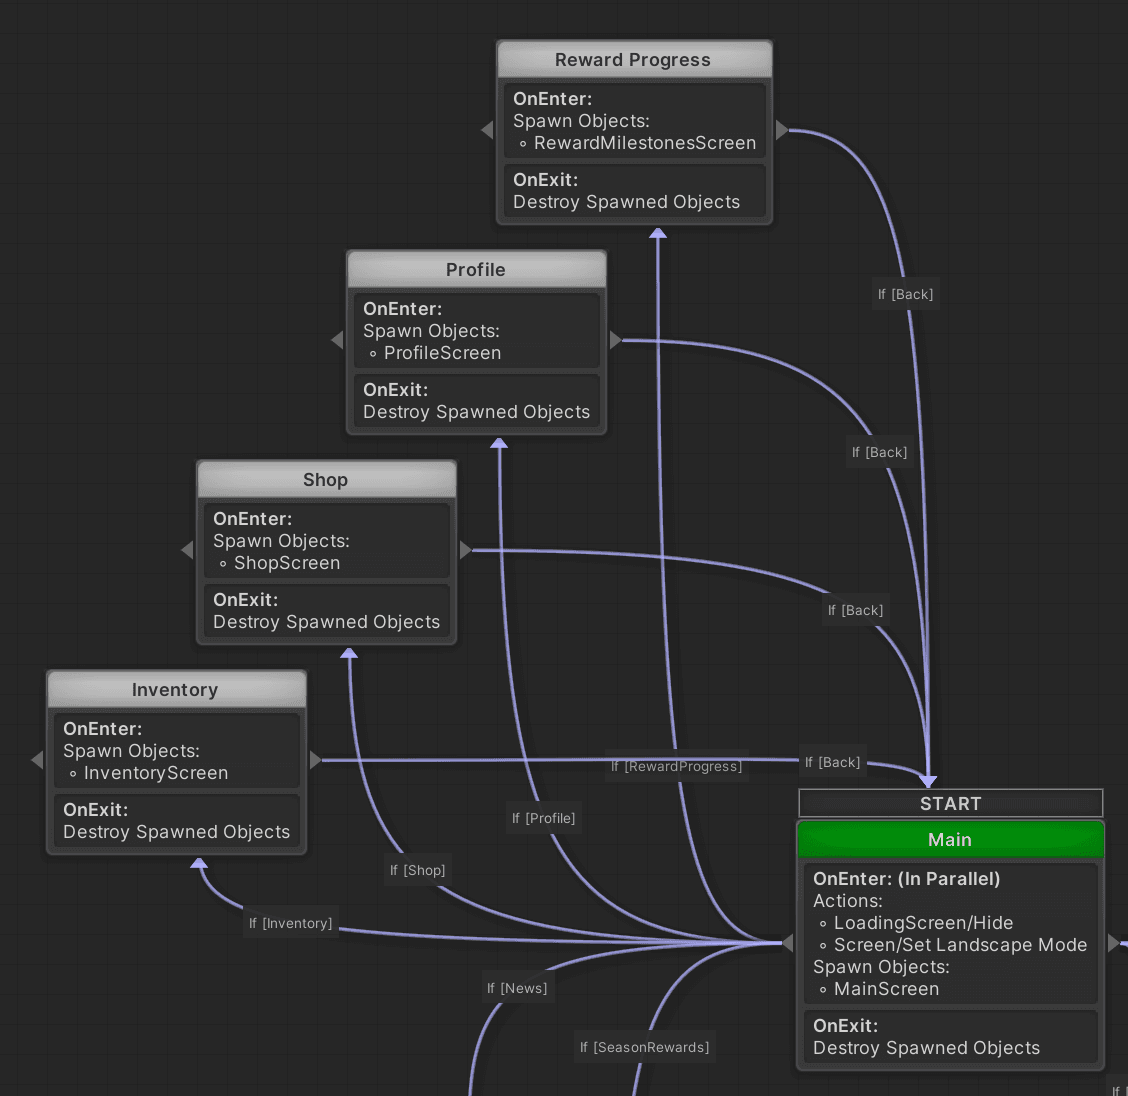
This is where the blue pass node comes in, it not do anything by itself, but is there just for visual aid to redirect transitions in a clean way to their target.
The pass node is skipped through instantly does not have a performance overhead or delay.
It is useful to add a name to the pass node to clearly indicate where it is leading.
After adding the pass nodes in the previous example, the transitions are no longer overlapping and are clearly heading away from the nodes.
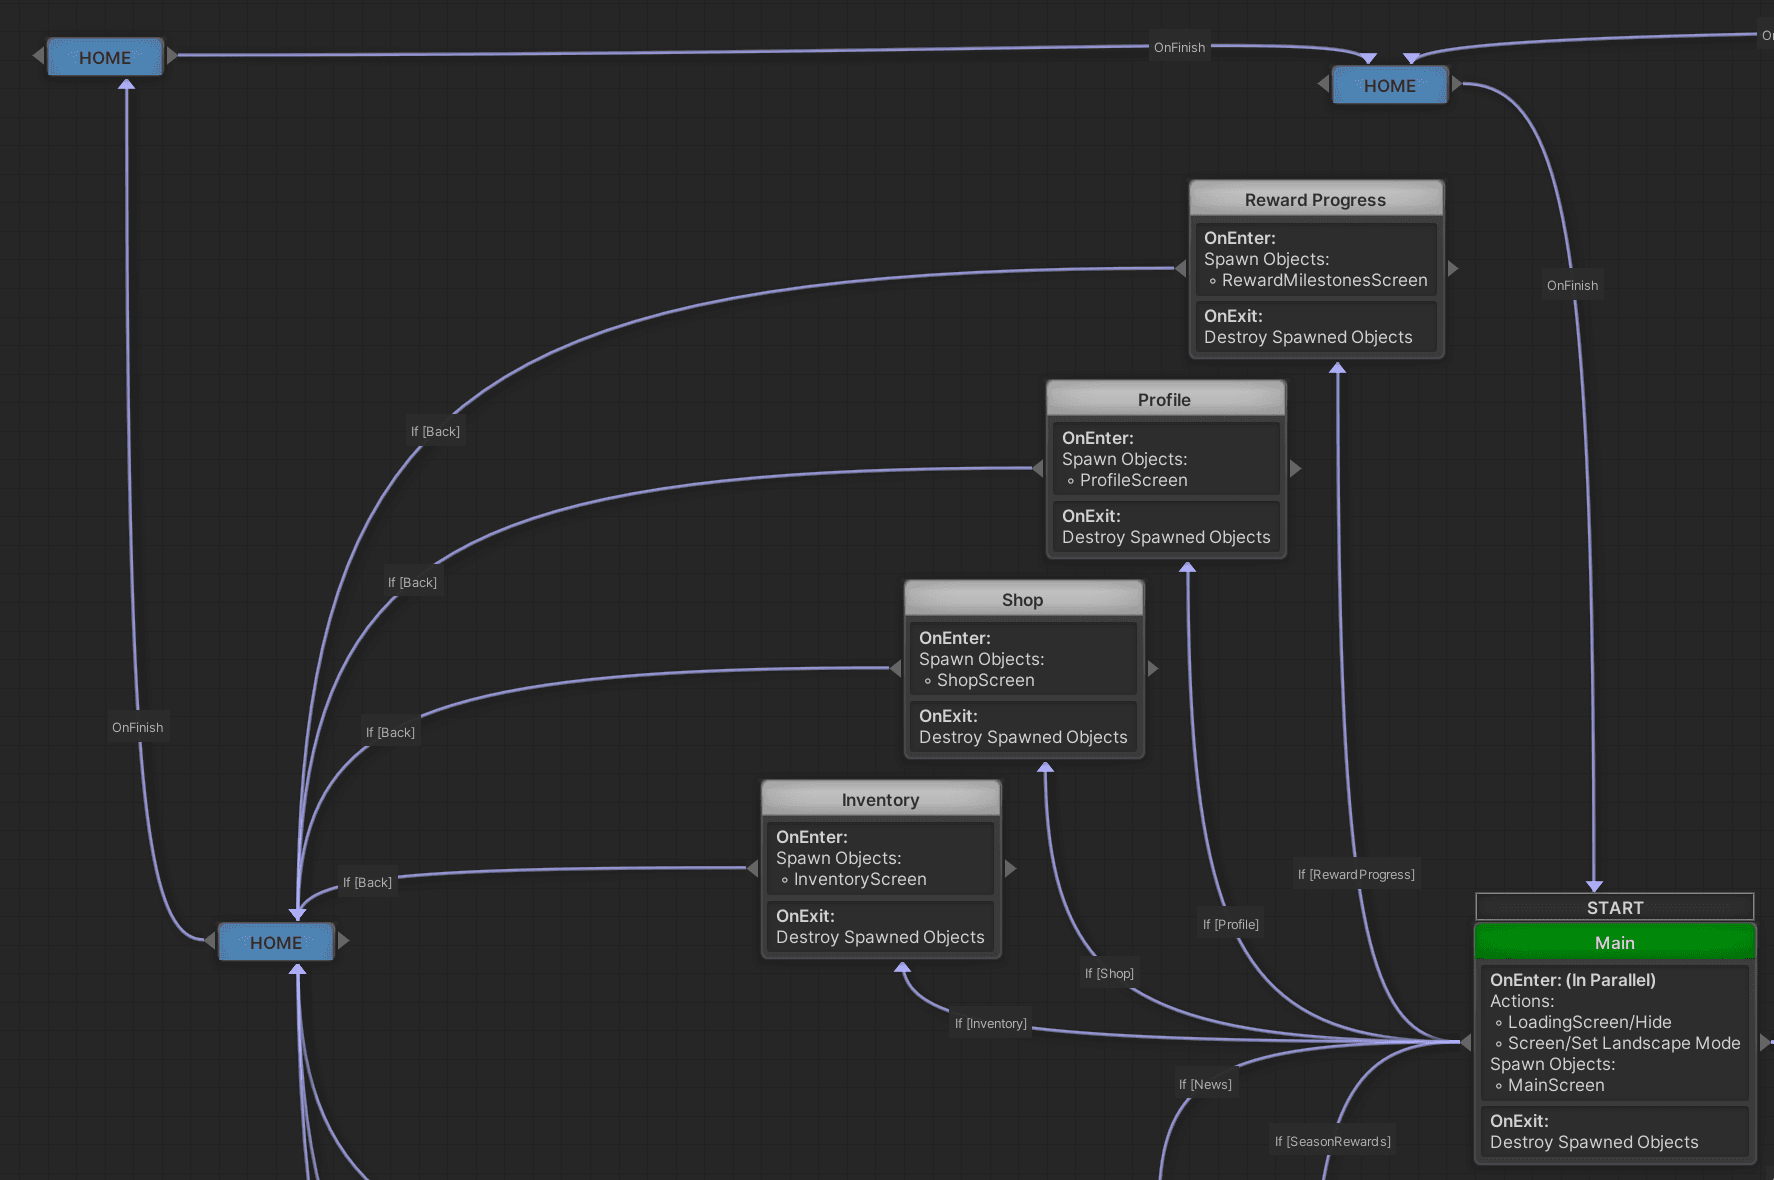
Avoid intersections
Avoid the transitions crossing as much as possible to create easy to read flows. Let the pass node guide your transitions around the flow area. This allows anyone to add expansions later and easily move items around.
Any State
The any state always checks if a transition is valid and activates the connected node.
There can only be transitions going out of this node.
The node can also be set to not re-trigger active states, which means it will not check a transition if the connected node is already running, this prevents endless node restarting.
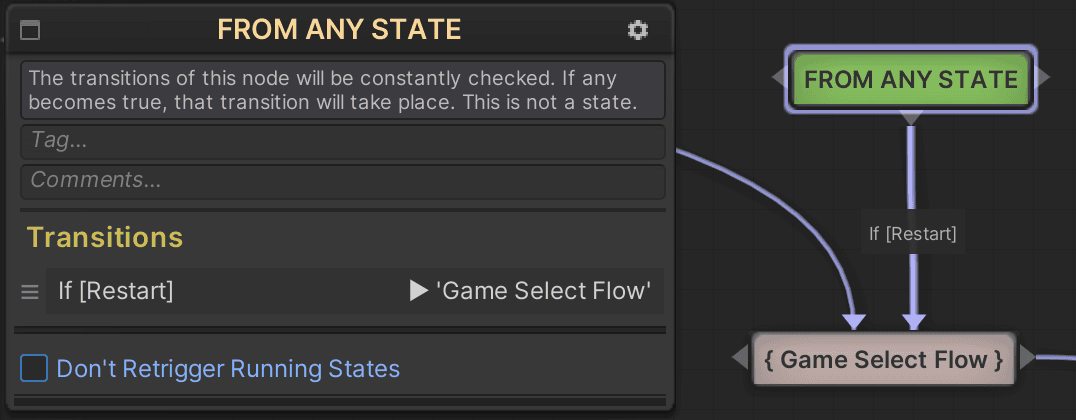
Use the any state with caution
Although this node seems to be extremely useful, it is a brute force node and its use often indicates there is an issue with the core design of the flow. Try to find a cleaner way to direct your transitions and use only when absolutely necessary.
Node layout
FSM Start node
Every FSM has an entry node marked by a Start bar on top of the node:
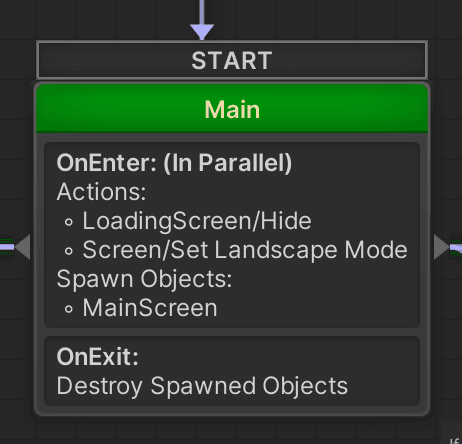
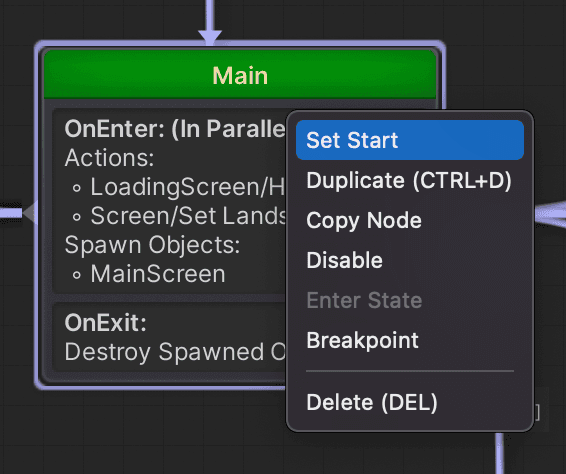
If you want to change which node should be the entry, right click on the particular node and press [Set Start].
Node name
It is a good practice to always set the node name after creating it to define its purpose.
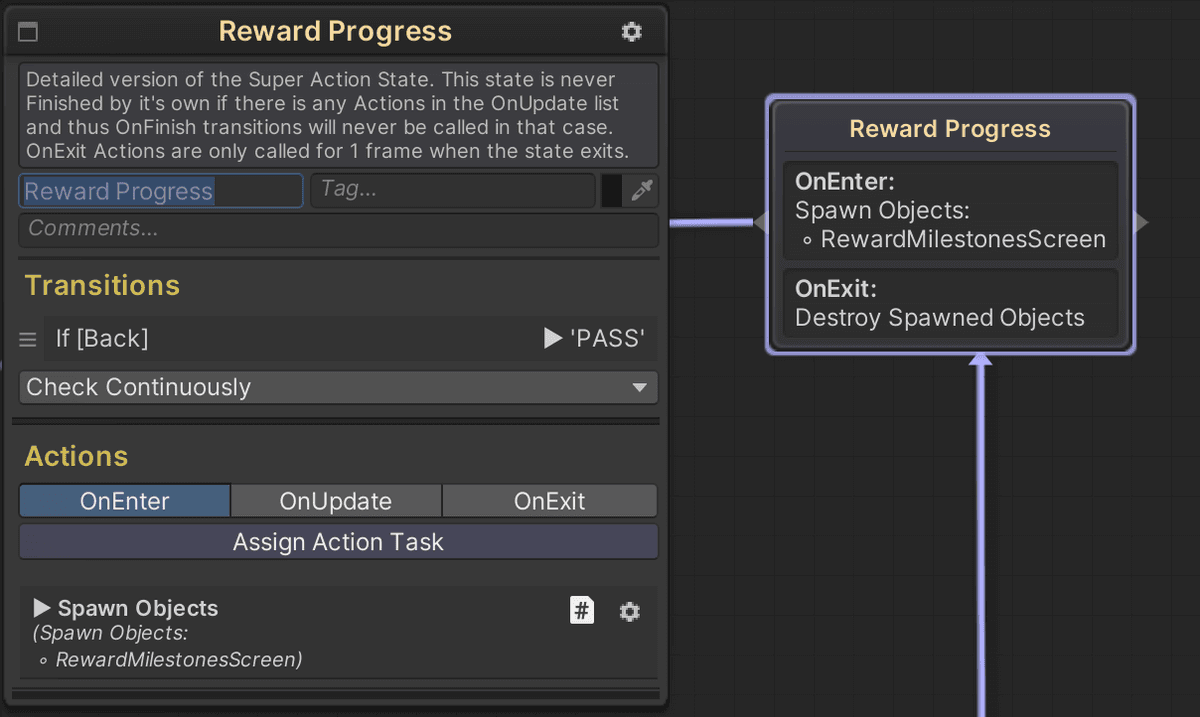
Change the title of every node for the these reasons:
- Easy for the developers to recognize what the node is meant to do
- Node select dropdowns in the inspector show only the names: when there are multiple nodes with the same name, they are merged and you cannot tell which node is selected
- Navigation through the debug menu only uses node names
- Analytics sends the names of the nodes in the events
Auto node naming
By default the name is set to the type of node, however when adding a Spawn Object flow action it automatically changes the node name to the name of the first item being spawned.
Duplicating nodes
When duplicating nodes, the name if the node is the same: it is a good practice to immediately change the node name after duplicating so you do not forget.
Comments and tags
Nodes can have tags and comments to add extra information for team members to understand more context on how the node should behave and why it is setup in this particular way.
Node color
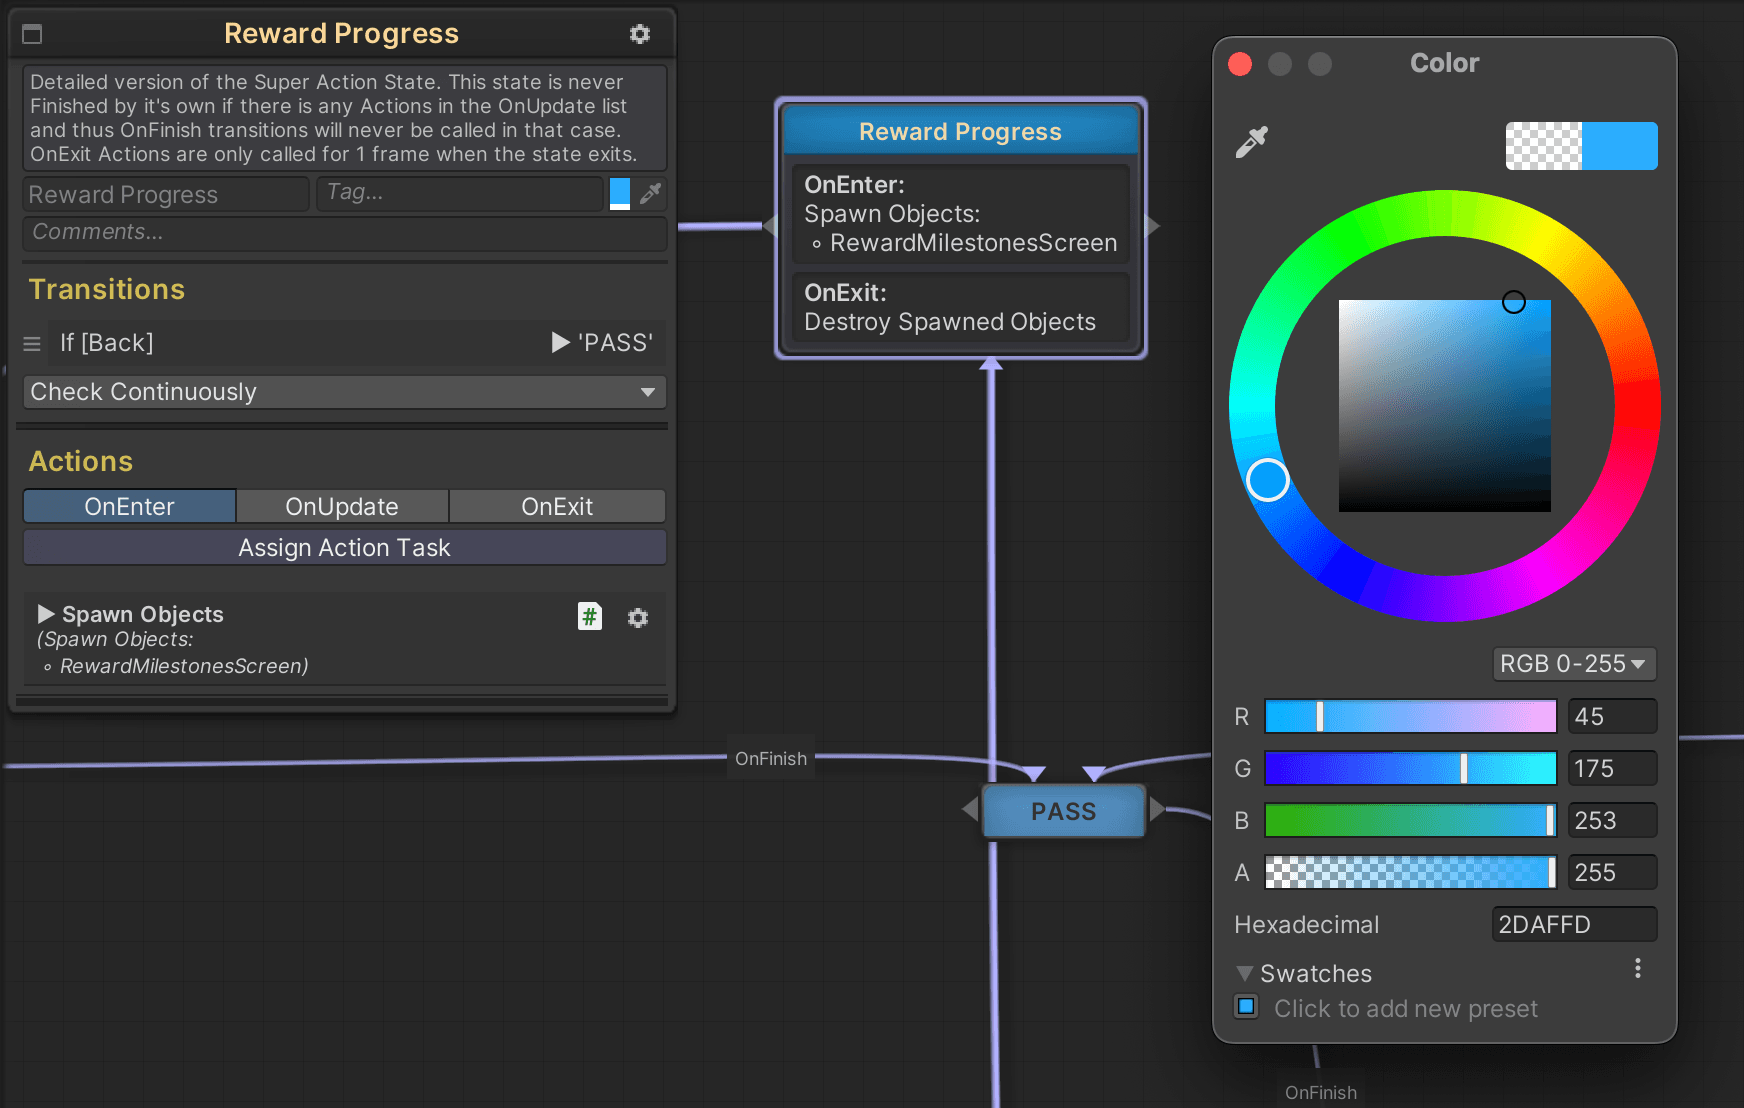
The node color can be changed by clicking the color next to the tag field.
Set the node colors in order to group nodes together, making it easier to see at a glance which nodes are of the same kind, or what its purpose is. The coloring format is up to the team to decide what makes the most sense.
Color not changing
If you do not see the color changing, make sure the alpha (A) value is not set to zero.
Node groups
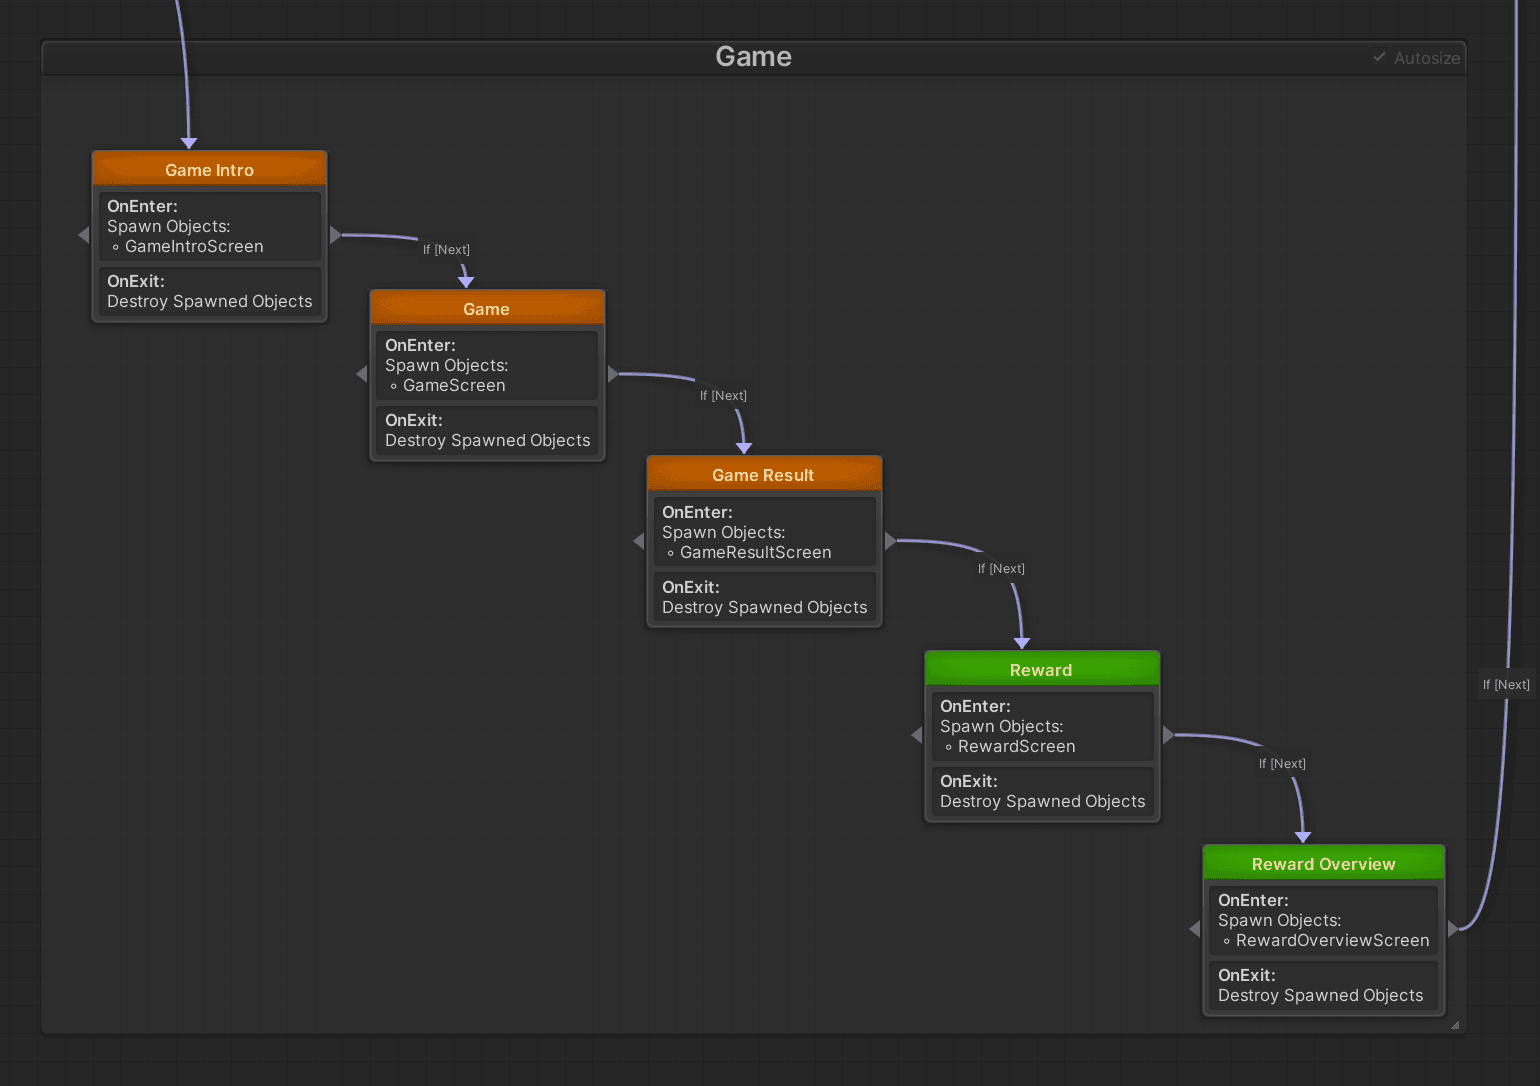
Drag an area on the graph while holding down ctrl to create a group. Groups make it easy to move around a lot of nodes at the same time, as well as making the graph more readable.
After creating the group, double click in the name to change it.
Autosize
The Autosize checkbox at the top right corner of a group will keep all nodes encapsulated within the group panel. Drag another node in or out of the group to include or exclude it from the group. Note that sometimes you need to wiggle a single node within the group to re-trigger the encapsulation process.
Node group color
Right click on the header and select Edit Color to open the color picker.
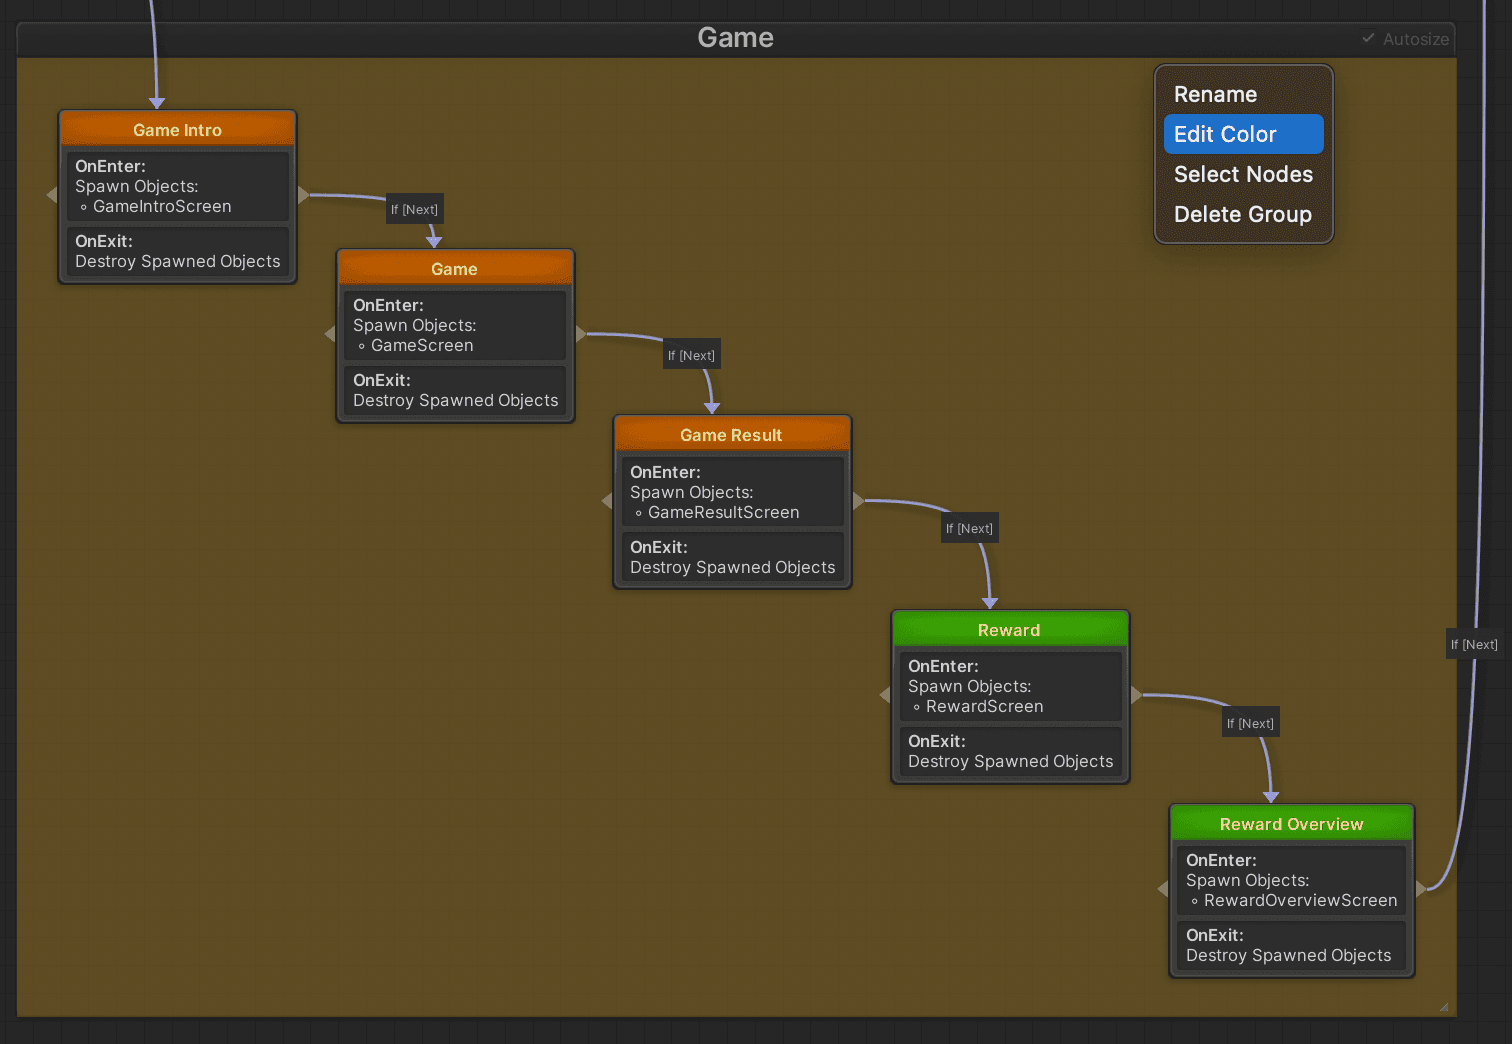
Use group color sparingly
Using colors on groups as well as the nodes may turn your graphs into a fairground.
Most projects do not get that big that adding colors adds a major benefit to readability.
Flow Actions
Flow actions define what happens while nodes are active. Add actions by selecting a node and click the [Assign Action Task] button. There are a lot of built-in actions, in this chapter we cover the GameSuite actions, for the NodeCanvas actions, refer to their documentation on how to use them.
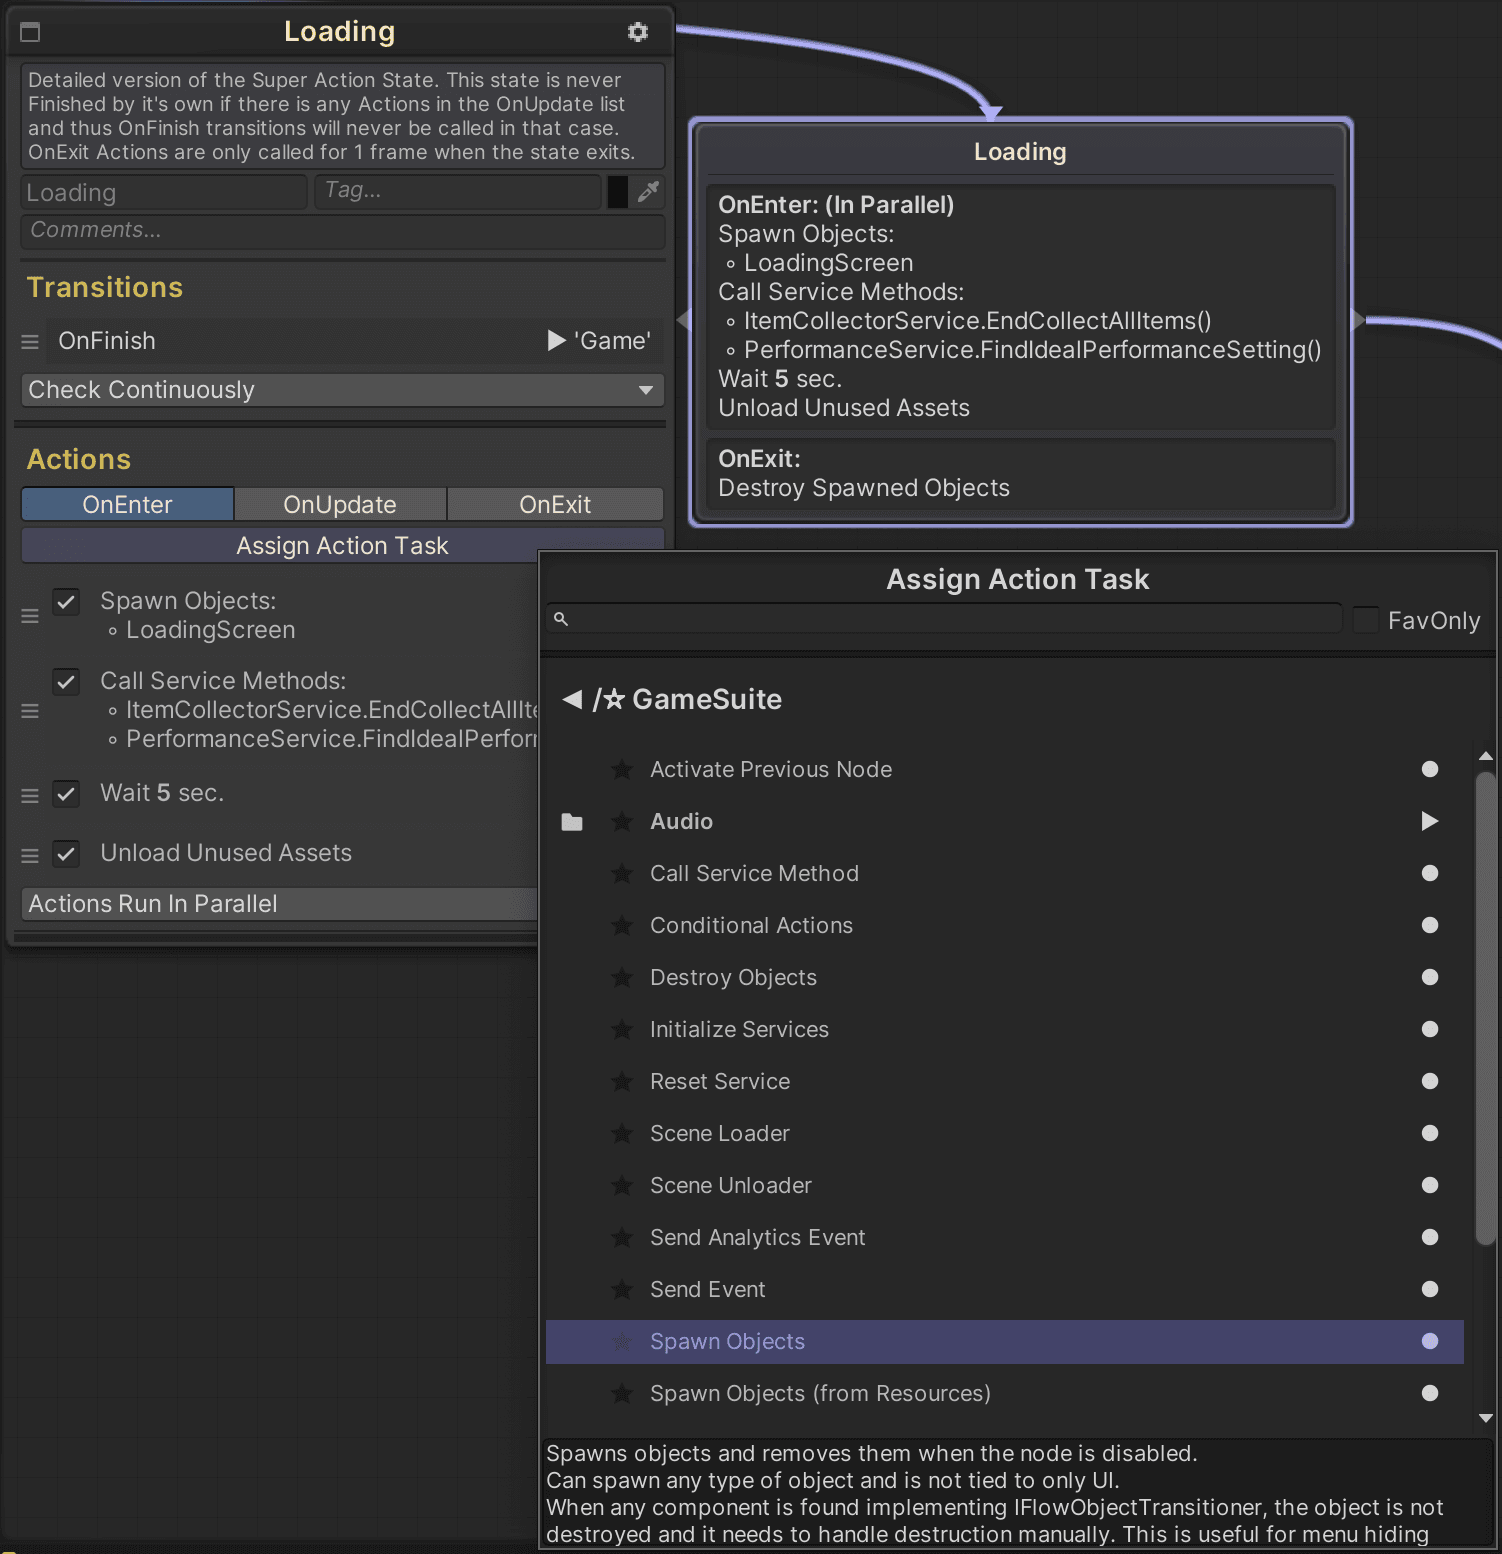
The node inspector panel behaves a bit differently than the GameObject inspector.
Click an action to see its inspector appear at the bottom of the node detail panel. If you click the same action again the inspector will disappear.
You can only inspect a single action details at a time.
Parallel execution
All actions will be started at the same time, regardless of if they are finished by the time the next one starts. This is the default execution setting.

The node also displays the text if parallel is set.

Sequential execution
Actions are executed one at a time. If you add a "Wait" action or async loading of a scene, it will first complete it before going to the next action.
This allows for complex sequences to be executed in a specific order.
Same as with the parallel option, on the node In Sequence is displayed:

Flow Conditions
Transitions
Nodes have actions assigned to them and are connected by transitions which have flow conditions assigned. A node can have an infinite amount of transitions.
In the node inspector an overview of all node output transitions can be found. Use the handles in front of the transitions :octicons-three-bars-16: to change the order in which the transitions are checked for.

Check continuously
This will check if any of the transitions is valid and can jump out of the active node while the node is not yet completed. This can be risky as some actions might (sometimes) not be completed resulting in race conditions to cause bugs.
Check after state finished
Only start checking if any transitions are valid after all the actions have been finished, meaning when the node is green.
Types of flow editors
Node canvas and Flow canvas contain multiple types of graphs. GameSuite mainly uses one: the Finite State Machine (FSM). It is good to get familiar with the other types and understand what they can do for your project.
Node Canvas
Finite State Machine (FSM)
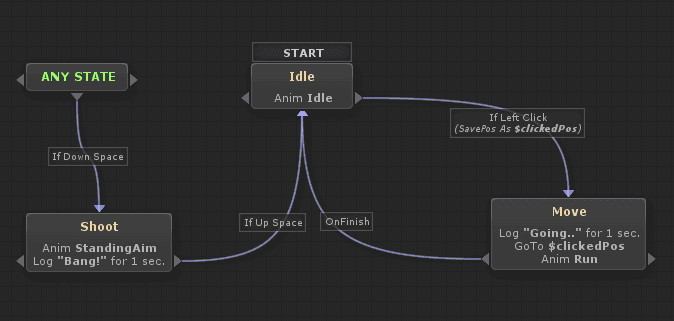
This is the Node Canvas system the GameSuite Flow Editor uses to allow easy creation of the app flow.
Within Hierarchical State Machines, only one state is active at any given frame (with the exception of using parallel nodes). While a state is active, all of its outgoing Transitions are evaluated per-frame and as soon as any of them returns True, that transition takes place and as a result, the current state Exits while the new state Enters. No more than one transition can take place within a single frame.
Behavior Trees
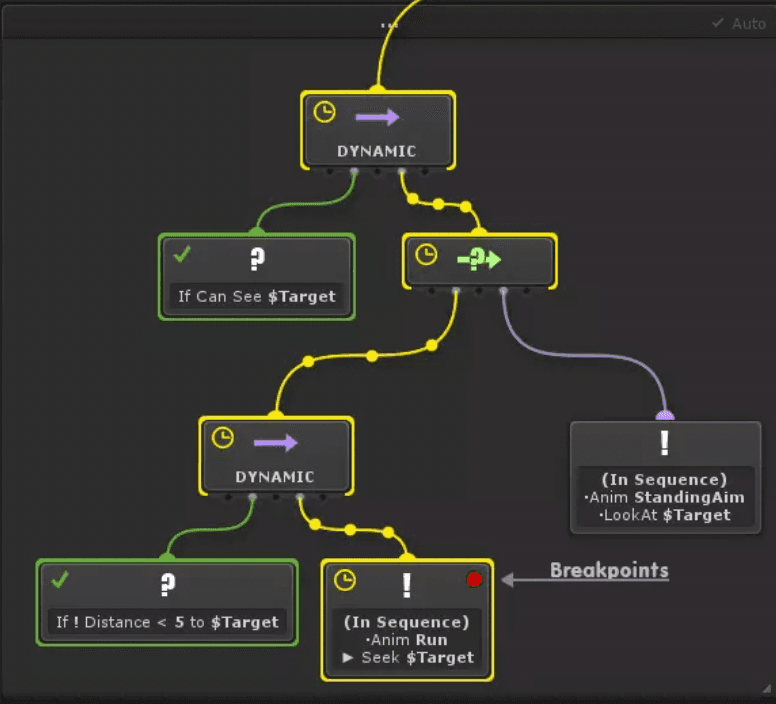
Use Reactive Behavior Trees to create dynamic character, Artificial Intelligence or behaviors for your games, by putting together small and modular building blocks. Reuse made behaviors amongst any number of different agents, save valuable time and organize your designs better with seamless combination of Behavior Trees with State Machines.
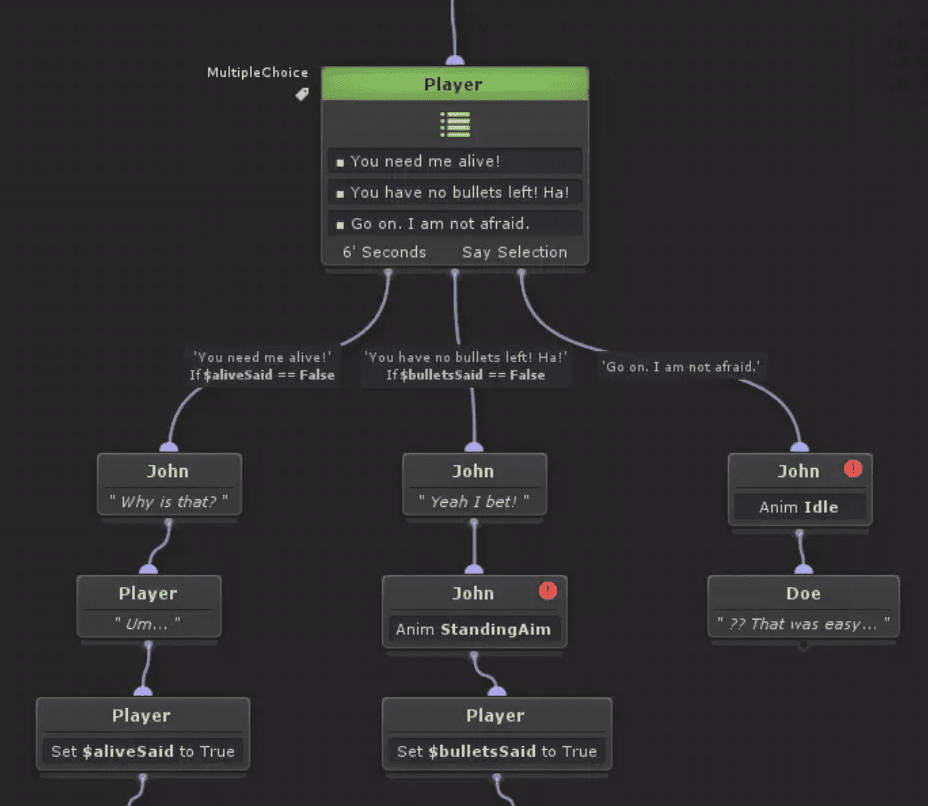
Dialogue Trees
Complex character conversations and non-linear, multi-actor dialogue trees usable with any UI system.
Flow Canvas
FlowScript
FlowScript is what comes closest to full visual scripting. It empowers you to create and manipulate virtually any aspect of gameplay elements for your games in a very similar fashion to Unreal Blueprints, but with far less programming knowledge required all around.
