🃏 Debug Menu
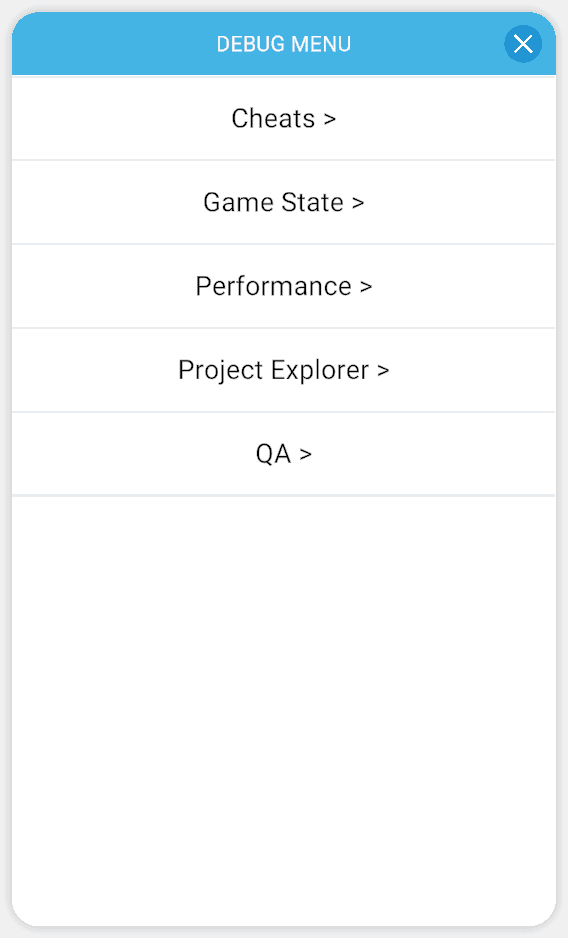
The debug menu is every tester's best friend as it allows to progress, test, find issues, investigate, diagnose and fix issues with the game fast.
It contains many build-in handy tools but is easy to expand and create any kind of additional debug screens, cheats and functionality.
Individual chapters in this documentation will cover any parts of the debug menu related to that chapter. This chapter covers in an overview how to use it.
Using the debug menu
The debug menu can be opened on different platforms in different ways:
Unity Editor and Standalone builds for Windows, Mac and Linux
Hold down any of these keys for 3 seconds:
- Tilde key ~
- Quote '
- Backquote `
- Alpha zero key 0 which is at the top of any keyboard
Mobile devices
- Hold down 3 fingers on the screen for 3 seconds, a pie will fill up in the top left showing the progress of opening the debug menu
- For (old) devices that do not support multi-touch, hold down in the top left corner of the screen for 5 seconds
Cheats
The easiest way to implement a cheat, is using conditional actions.
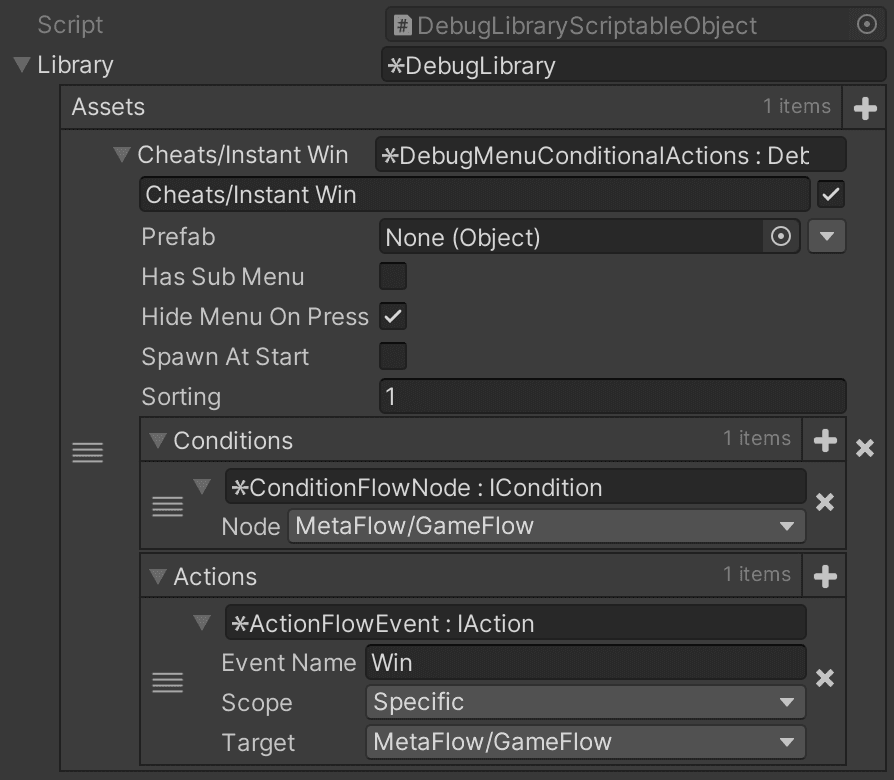
Create a DebugLibrary by right clicking in the project and selecting GameSuite/Libraries/DebugLibrary.
Then create a DebugAsset and add the DebugMenuConditionalActions implementation.
Give it the name, which is the name and hierarchy it will appear in the debug menu, for example Cheats/Instant Win.
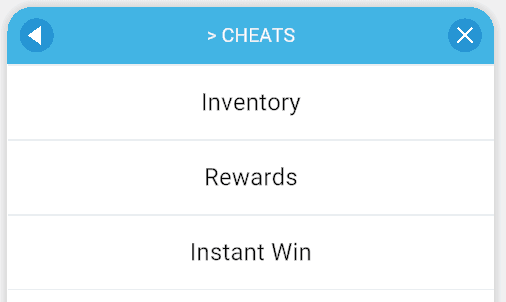
The option has now appeared in the Cheats menu:
Overlay
In some cases, the game should spawn a screen on top of the entire game for debugging purposes, such as the built-in version number overlay or the performance graph.
Create a DebugMenuOverlayToggle which will spawn the set Prefab in the Unity hierarchy when pressed.
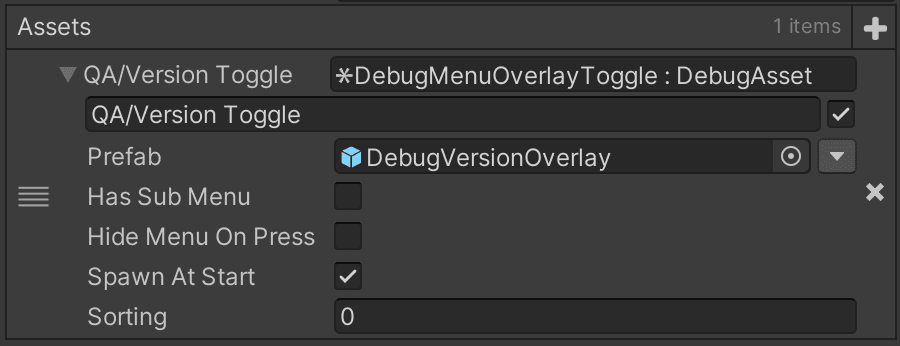
Enable Spawn At Start to spawn the object when the game starts. Else you need to manually enable it by pressing the debug menu item button.
Disable version overlay
When an item is set to Spawn At Start, like the version toggle, it is still possible to disable the object by tapping the menu item, in this case: QA/Version Toggle. This allows the user to create screenshots of the game without the version on screen.
Spawn anything
The DebugMenuOverlayToggle spawns any GameObject, this does not need to be a screen. So do or spawn anything that is required.
For example, toggle a weapon rack in the beginning of the game, which contains all weapons and items, for testers to pickup. When the debug menu is disabled for release builds, this item is not spawned as well.
DebugAsset default options
DebugAsset has multiple settings:

Prefab
This is the asset getting spawned inside of the debug menu window, a few have been made available by default, but feel free to create your own.
Has Sub Menu
When tapped, does this open an inner window, if so, it will spawn the set Prefab in the debug menu hierarchy.
When having a toggle, such as showing or hiding a version overlay, or when executing a cheat, it is not required to have a separate sub menu.
Hide Menu On Press
When pressed, it automatically closes the debug window. Useful when using a cheat such as Instant Win so you can immediately see the result of winning without adding an extra step to close the debug menu.
Spawn At Start
This will instantiate the debug menu item when the debug menu itself is spawned. This can be useful for a version overlay that should always be visible on top at all times during debug builds.
This does not need to be a screen, it just spawns the prefab, which is just a GameObject and can contain whatever you need.
Sorting
This is the draw order of the menu item in the hierarchy. By default, it is sorted alphabetically. But in case you need to draw it at the bottom, go 1 or higher, if it always needs to be at the top, go -1 or lower.
Custom debug menu
Override the available DebugAsset classes to get the desired type of debug menu.
DebugAsset
Inherit a new script from DebugAsset and add it to a DebugLibrary to see it appear in the debug menu.
There are optional overrides which help with different types of implementation:
public override void Spawn(RectTransform parent)
{
    // The panel should get spawned here under the parent RectTransform.
}

public override void Show()
{
    // The debug panel became visible again, or for the first time.
    // This can be used to refresh the content of the panel.
}

public override void Hide()
{
    // The user closed the debug menu,
    // or navigated back to in the debug menu hierarchy.
}

public override void Toggle()
{
    // Gets executed in case the debug menu has HasSubMenu set to disabled,
    // and there is no submenu to spawn from this panel.
    // Use this when the user has pressed the button in the debug menu.
}
ButtonDebugAsset
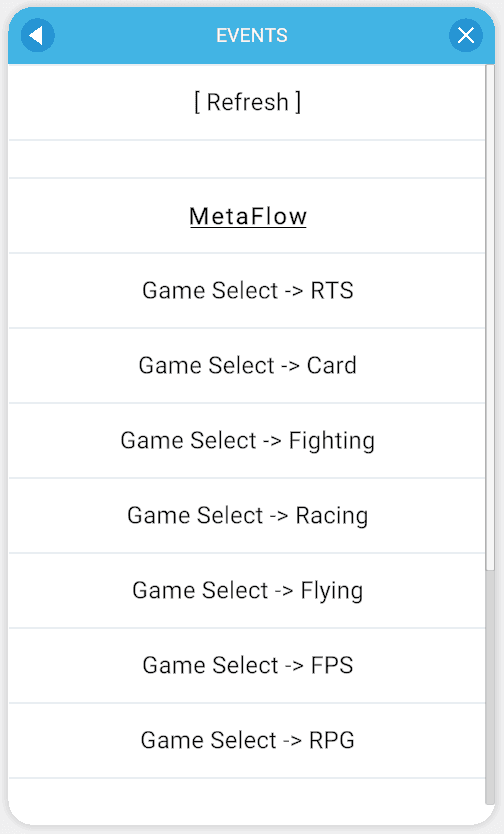
If you need a menu full of buttons, with titles and spaces in between, this is the one you need. Create a new class and inherit from ButtonDebugAsset to get access to the layout options.
Create a DebugLibrary and add your new asset.
As the Prefab, assign the DebugButtonPanel.

Use these methods to spawn titles, buttons and spaces in between:
SpawnTitle("Title name");
SpawnSpace();
SpawnButton("Button name", Action callback);

// Call this to clear all items on screen.
DestroyButtons()
There are overrides with extra layout options, such as aligning text to the left or adding bold text.
The methods also return the GameObject which is spawned.
BigScrollDebugAsset
BigScroll is an infinite size scroll list. This is useful for displaying 1000s of items such as a debug menu.
For the Prefab, assign the DebugBigScrollPanel GameObject.
Then create your custom button or other UI element in the ElementPrefab in the inspector.
Create a Decorator script which accepts the data you need to display on the ElementPrefab. This can be anything you need, such as a custom struct.
Then on the new DebugAsset script which inherits from BigScrollDebugAsset, call AddElement and pass in the data to populate the BugScroll are in the UI.
AddElement(object content)BigScrollDebugAsset also has an override Initialize which can be used to pre populate the list once.
Release builds
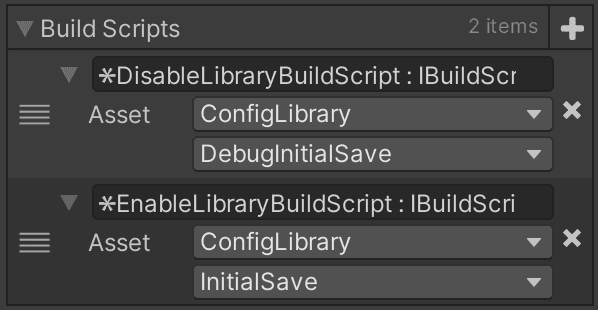
In order to disable the debug menu for release builds, use 2 versions of the InitialSave and enable the correct one at build time.
It is also possible to remove it from the MainFlow altogether.
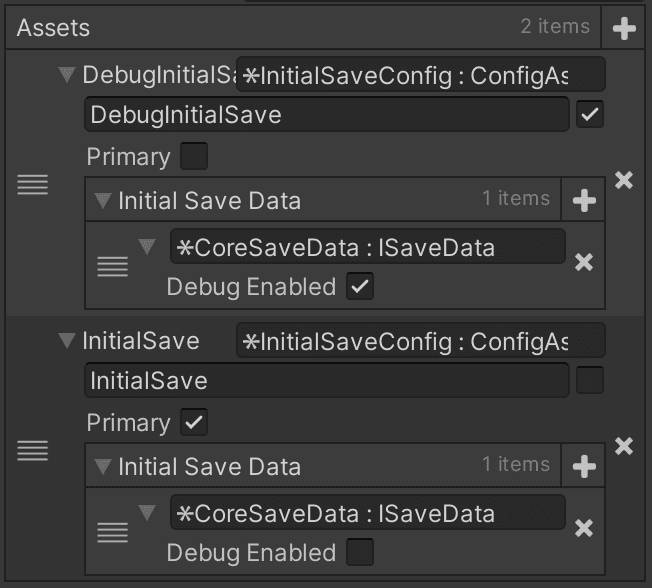
Add a duplicate initial save file for live builds and use a DisableLibraryBuildScript to disable the debug version of the initial save. See build process to learn more about switching assets for different builds.
